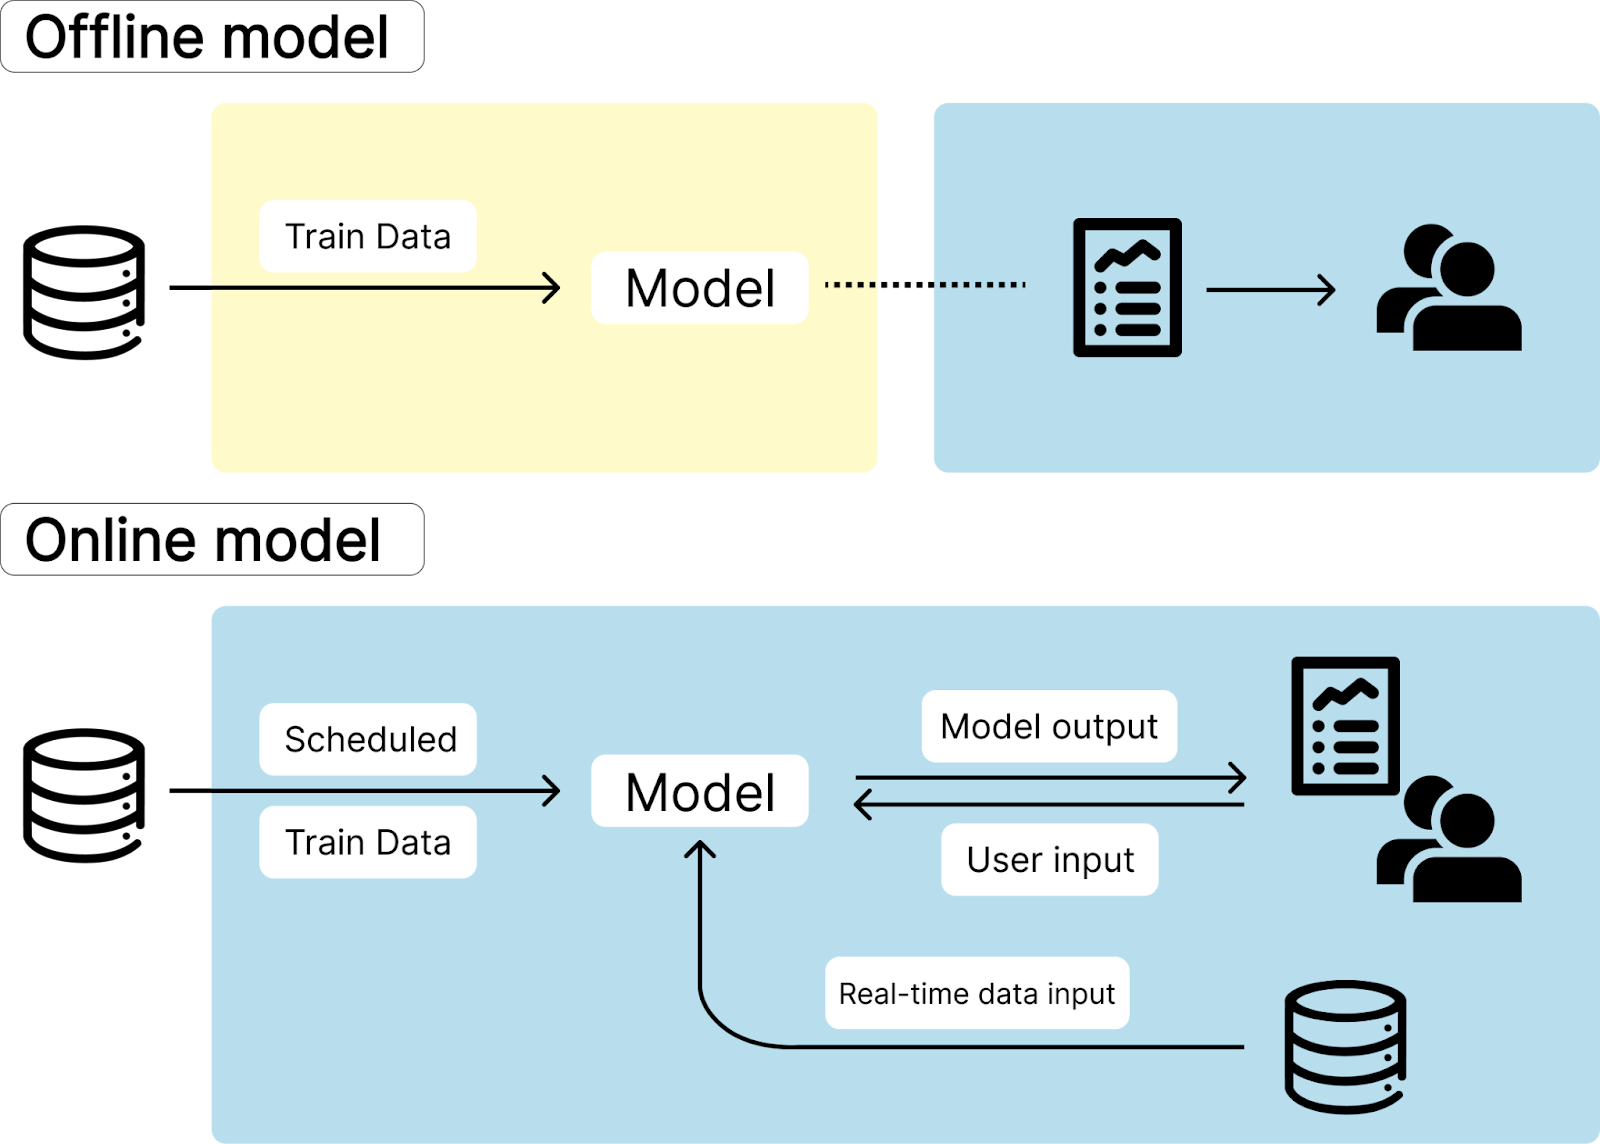
Machine learning models are often developed in an offline Jupyter notebook. However, in order to enable the models to learn from live data and interact with users, they have to be deployed to a production environment that is connected to a live data pipeline and with a user friendly interface.
A common complaint is that deploying machine learning models in production is a complicated process, especially when the model builders are data scientists and data analysts. Almost always, they'd have to learn to use MLOps tools that are not designed for their expertise or seek help from engineers.
This issue is so widespread that some experts estimate up to 90 percent of ML models remain in Jupyter notebooks and are never utilized by real users other than the data analyst who built it. Data analysts have to run these models with new input in an offline notebook manually, and then copy the results to one page on their reports. This limitation capped the models' utilization, diminishing their potential value and impact.
For the relatively few ML models that do make it to the production stage, the deployment process can be time-consuming due to complex dependencies and debugging. Additionally, these models require ongoing attention for maintenance and adjustments.
In this blog post, we are going to explore the basics of deploying a ML model and building an interface for users, the challenges that you might face, and the steps that can be taken to make the process more efficient.
How to deploy machine learning models
We will primarily discuss two methods for deploying machine learning models: one is to wrap the model in an API endpoint and deploy it on the cloud using a container, and the other is to integrate the interface with the model running in a Jupyter Notebook through an SDK.
Deploying trained models with Flask and Docker.
The most popular way among data scientists is to use Flask and Docker to deploy the model. Flask is a lightweight and easy web framework for Python, widely used for creating APIs. Then, by incorporating Docker, which facilitates a more efficient, scalable, and consistent deployment process across various computing environments. You can deploy the containerized machine learning model on AWS, GCP or any cloud providers you like. If the model can run on CPU and some latency is not a problem, use some serverless option like AWS Lambda or SageMaker Serverless. For larger models, consider a virtual machine (like AWS EC2) with autoscaling & load balancing.
The code snippet here is a basic example to developing an API endpoint for a machine learning model using Flask. In this example, a trained ML model, designed for sales prediction, is stored in 'ml_model.bin'. A function "predict_endpoint" is defined to process input for the model, call the machine learning prediction, and then generate the output. Using the @app.route Decorator, the function is defined as an endpoint. Once set up correctly, the endpoint can be accessed and tested through the URL http://localhost:9696/predict.
After that, you can also create a user interface to interact with your model. This interface can be a webpage, a desktop application, or even a mobile app, depending on your audience and requirements. Through this interface, users can input the necessary data (for instance, details relevant to sales predictions) and submit it. The interface then sends this data to your Flask API (at the /predict endpoint) and displays the returned predictions to the user. You can use HTML/CSS to build a webpage, or use an app builder to build the interface out.
import pickle

from flask import Flask, request, jsonify

# import dictionary vectorizer and model
with open('ml_model.bin', 'rb') as f_in:
   (dv, model) = pickle.load(f_in)


def data_prepare(input_data):
   features = {}
   features['leads'] = input_data['leads']
   features['date'] = input_data['date']
   return features


def predict(features):
   X = dv.transform(features)
   preds = model.predict(X)
   return float(preds[0])


app = Flask('sales-prediction')

# the predict_endpoint function is wrapped as an api
@app.route('/predict', methods=['POST'])
def predict_endpoint():
   input_data = request.get_json()

   features = data_prepare(input_data)
   pred = predict(features)

   result = {
       'sales': pred
   }

   return jsonify(result)


if __name__ == "__main__":
   app.run(debug=True, host='0.0.0.0', port=9696)
Deploy with Acho:
Acho enables you to deploy your machine learning model directly from your Jupyter Notebook to users via the Acho SDK. This approach allows the model to run in your development environment, either local or on-cloud Jupyter Notebook, thereby avoiding any issues related to environmental dependencies in model deployment. You can also create an interface using Acho's Data App Builder, allowing users to interact with the machine learning model through this interface.
To integrate Jupyter Notebook in Acho, need to import acho SDK in your notebook by
from acho import SocketClient, AppTo install the SDK, use pip by running the command:
pip install acho-sdkOnce the SDK is installed and imported, you can connect the app to the Jupyter Notebook. Use the code below, making sure to replace 'your_api_token' and 'your_app_id' with your actual API token and App ID:
host = "https://kube.acho.io"
namespaces = ['/soc']
# PUT YOUR TOKEN HERE
token = "Your acho API token"
# Define your app here
app = App(id="Enter your app id here", token=token, base_url=host)
app_version = app.version("Enter your app version id here")
pub_app_version = await app.version_published()
app_version.socket.get_notebook_attr()
await app_version.connect()
await app_version.join()
await pub_app_version.connect()
await pub_app_version.join()
Add a Python notebook node in the app you just connected. You will find the Jupyter notebook you've connected there. Now, the data app can send events to the Jupyter notebook to trigger model execution, and receive feedback from the Jupyter notebook to display the results back to users. Here's an example: The Notebook will run a hello_world function in response to an event in the data app and return a 'you are welcome' message.
async def hello_world(data):
    print(data)
    print("hello world")
    await app_version.send_webhook({"message": "you are welcome"})
app_version.socket.hook("hello", hello_world)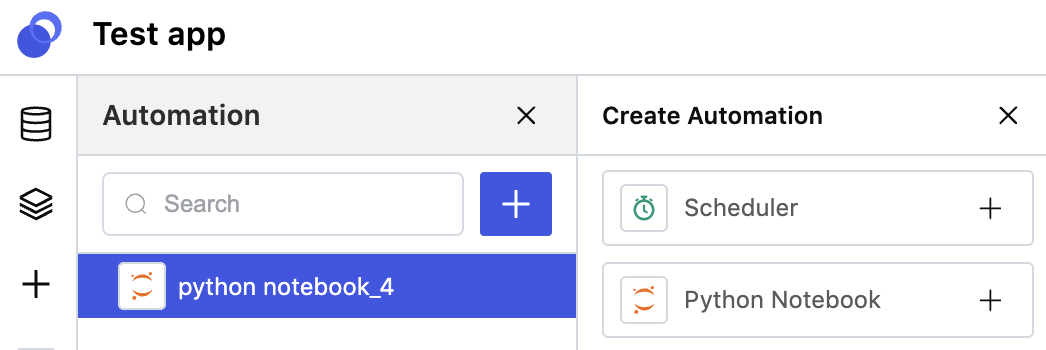
To boost utilization, adding integration to live-data is essential. Avoid requiring users to re-enter data into the model if it's already present in your database, such as recent sales and leads data from Salesforce or your ERP system. With Acho, you can easily connect to over 600 types of data sources. Utilize a SQL-based semantic layer to extract real-time data and feed it into the machine learning model, along with user input. This would both increase the prediction accuracy and user experience.
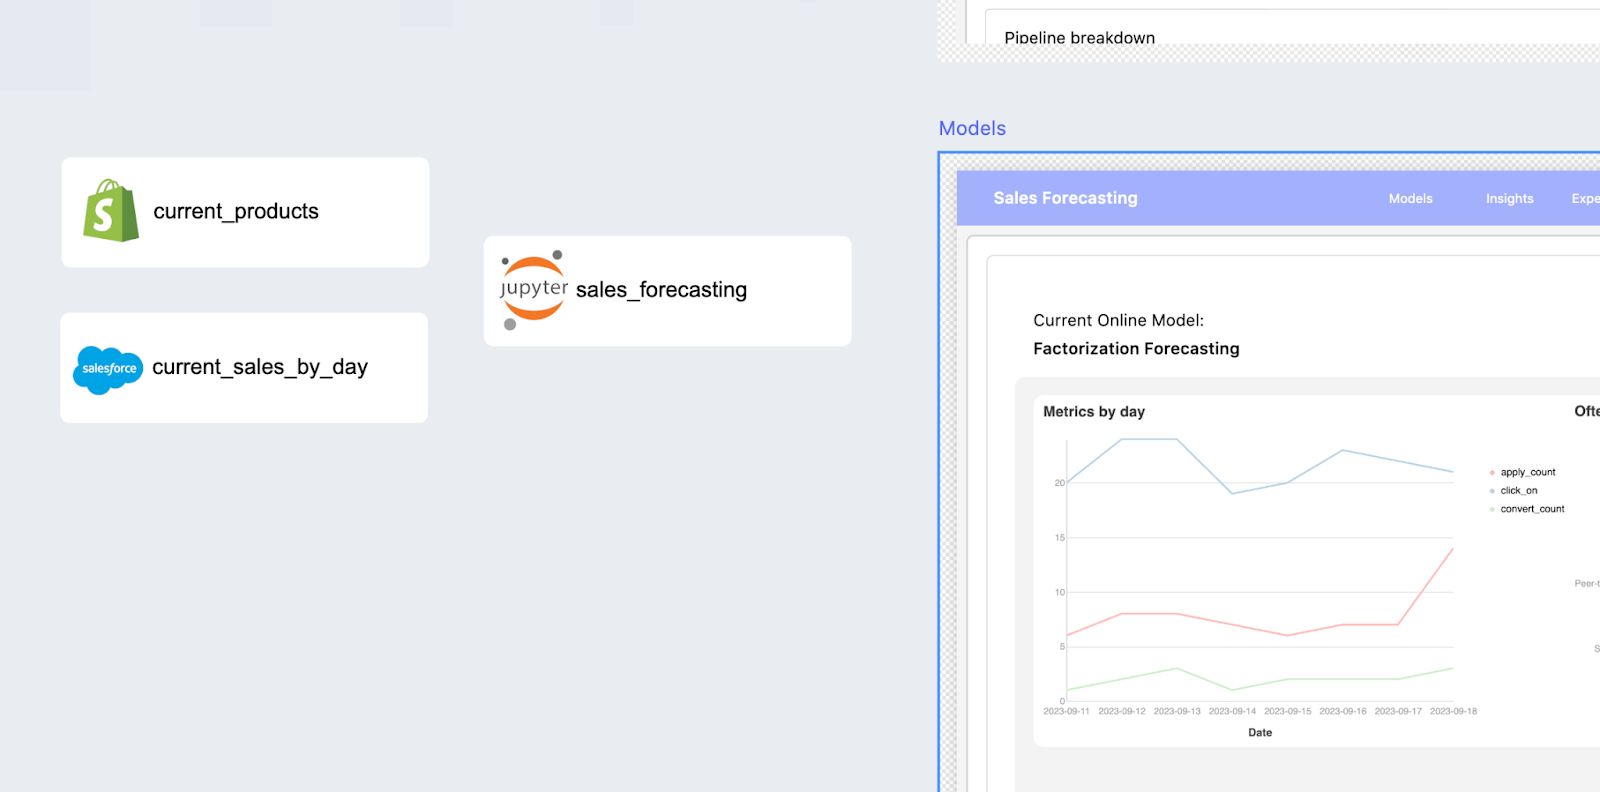

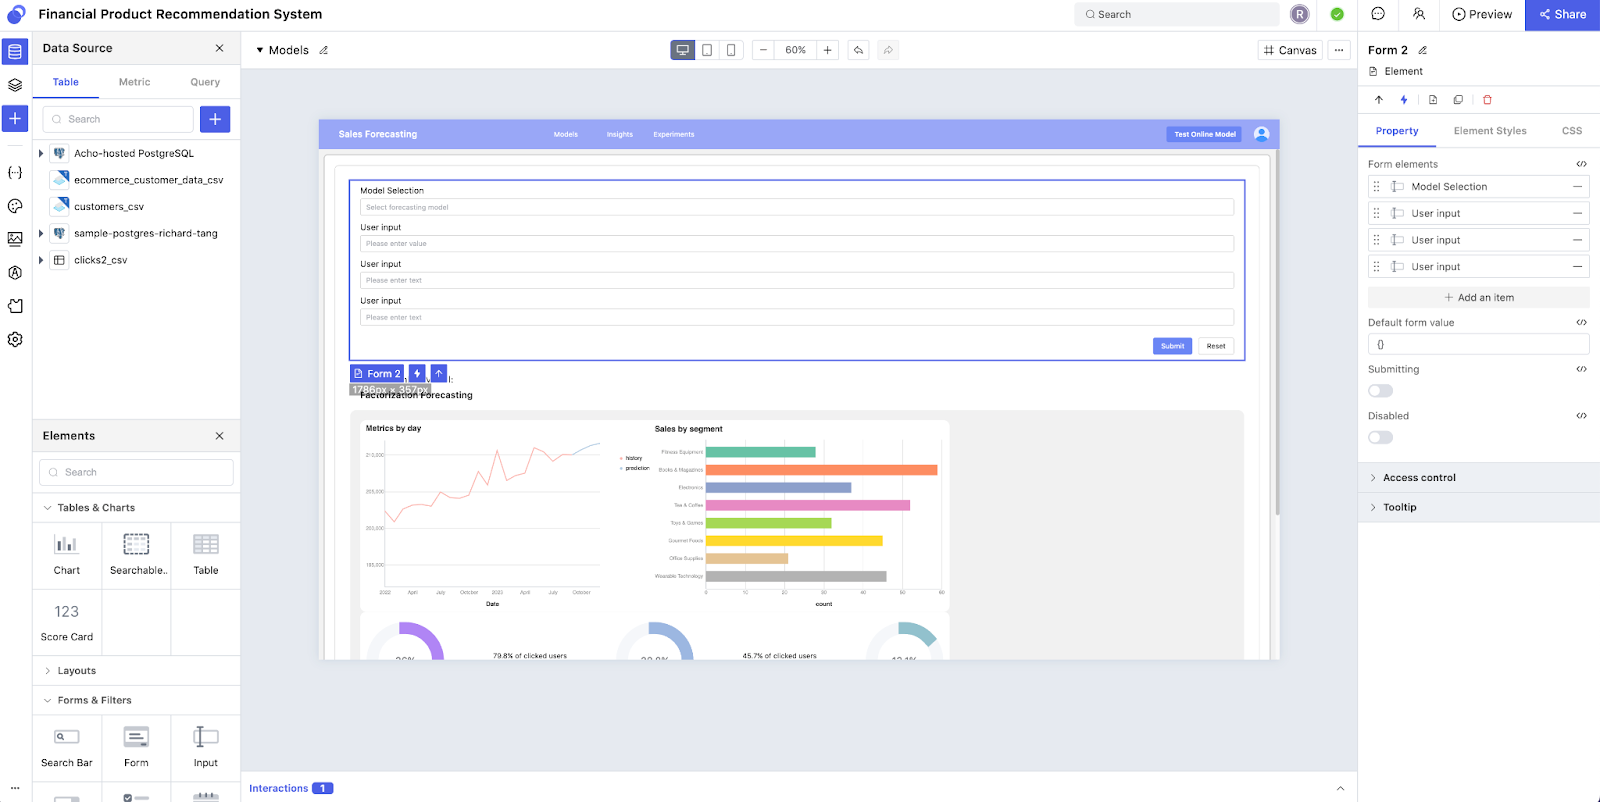
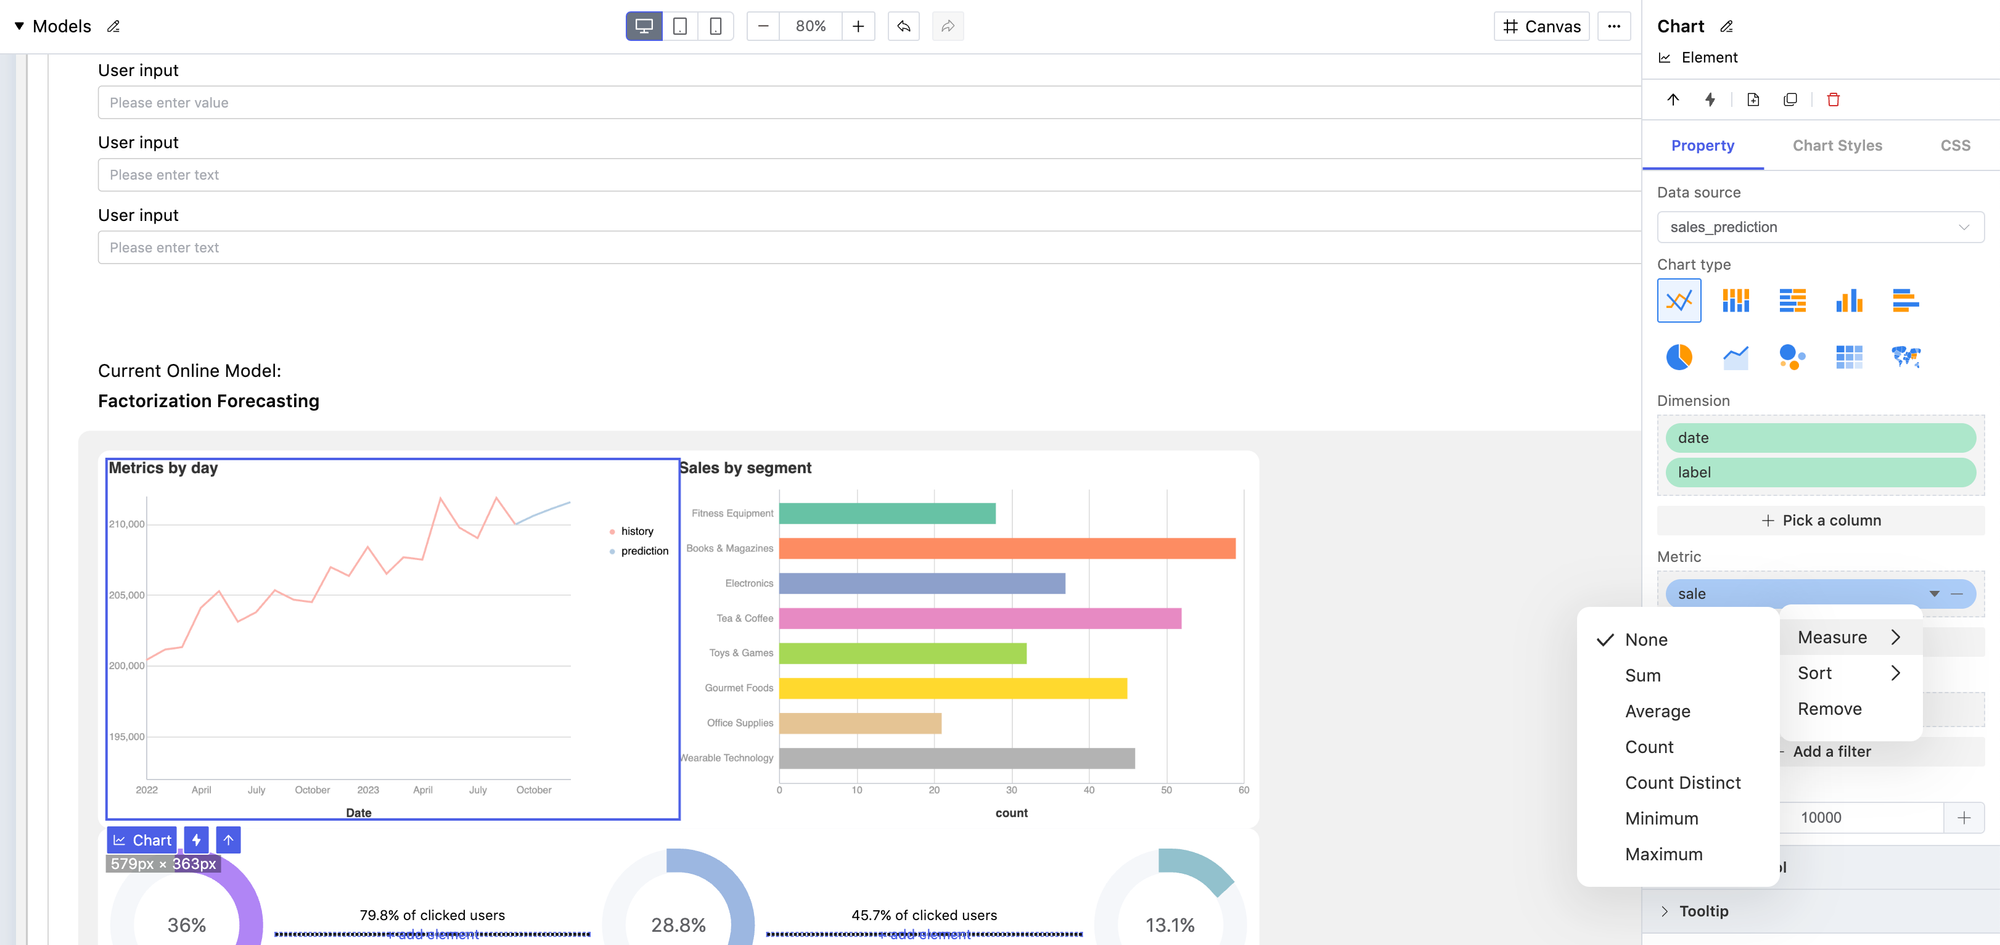
Next, you can create an interface within the low-code environment. Here, you can visualize the model output and build interactions to collect user input. There are plenty of templatized elements and charts available for use. Low-code environment makes adding and arranging components as simple as drag-and-drop. At the same time, you retain full customization capabilities for the logic in the interactions. You can even add a button to send the model output by email or issue a Slack alert, or add interpretation and analysis to the model output... almost anything you can think of. Consequently, you'll maximize the utilization of your machine learning model and ensure that your users get benefits from the model.
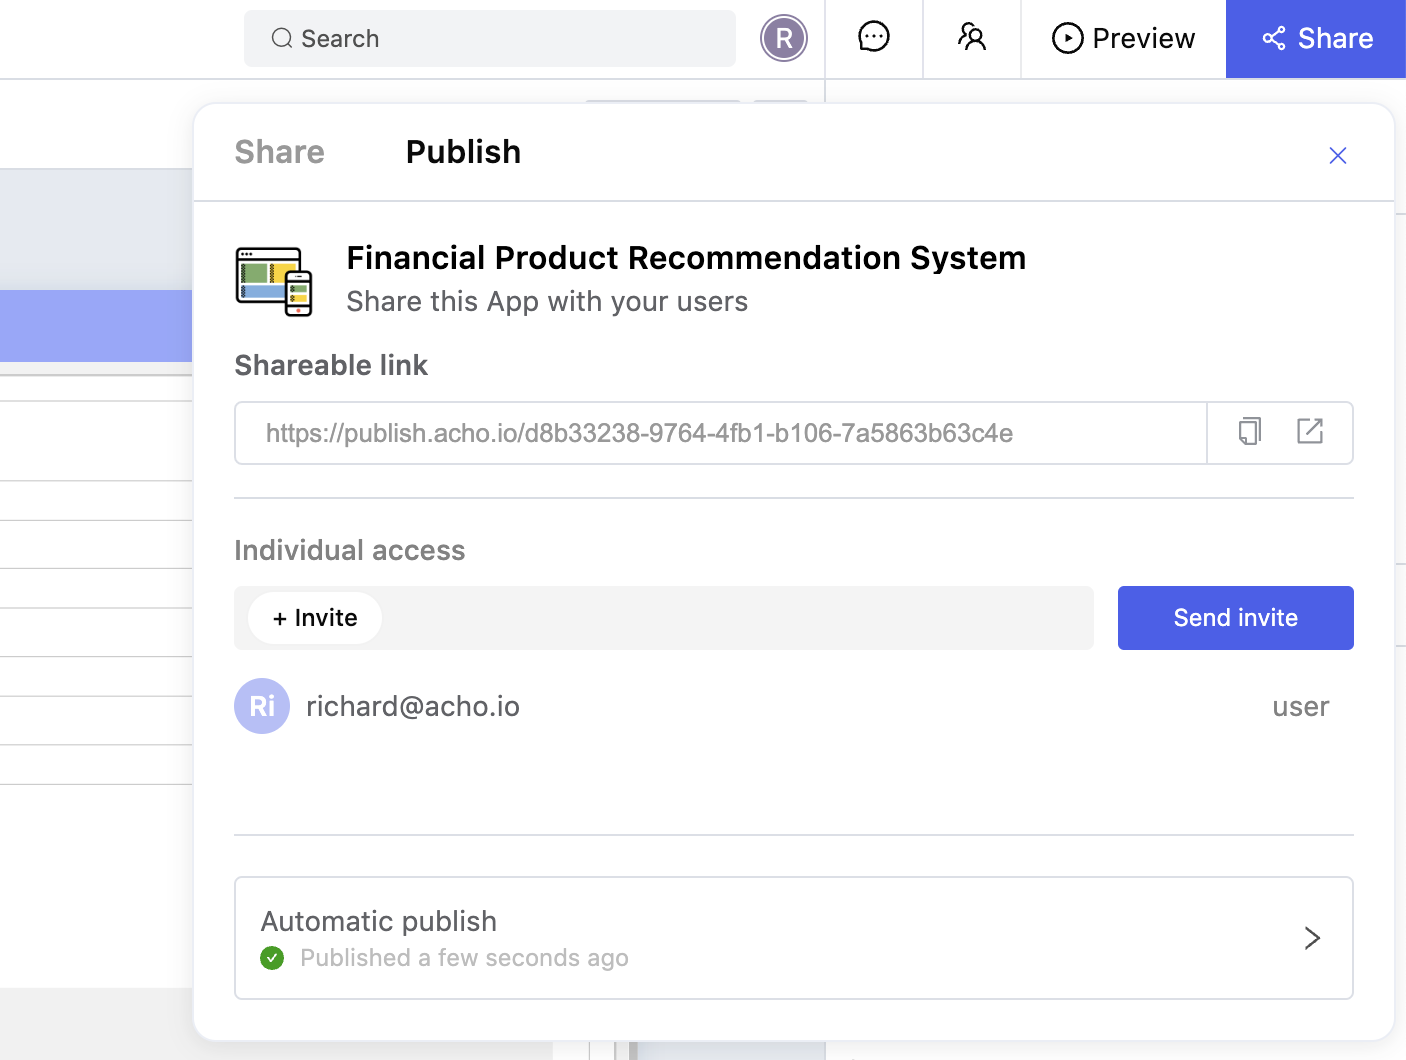
Publish, share and collaboration
After you have built out the interface, you can publish the application and share it with your team. Users will receive an email guiding them on how to log into your app. They can also participate in collaboration, dropping comments to aid in the app iteration. Getting users involved in the development process is very effective; it typically accelerates the development pace and yields better utilization.
Conclusion
The tools for MLOps are powerful, yet they are not particularly user-friendly for data scientists and data analysts. Deploying machine learning models on the cloud using Flask and Docker is a popular approach. To simplify deployment and facilitate integration with interfaces, Acho provides a solution for data analysts to deploy machine learning models and enables users to interact with them.