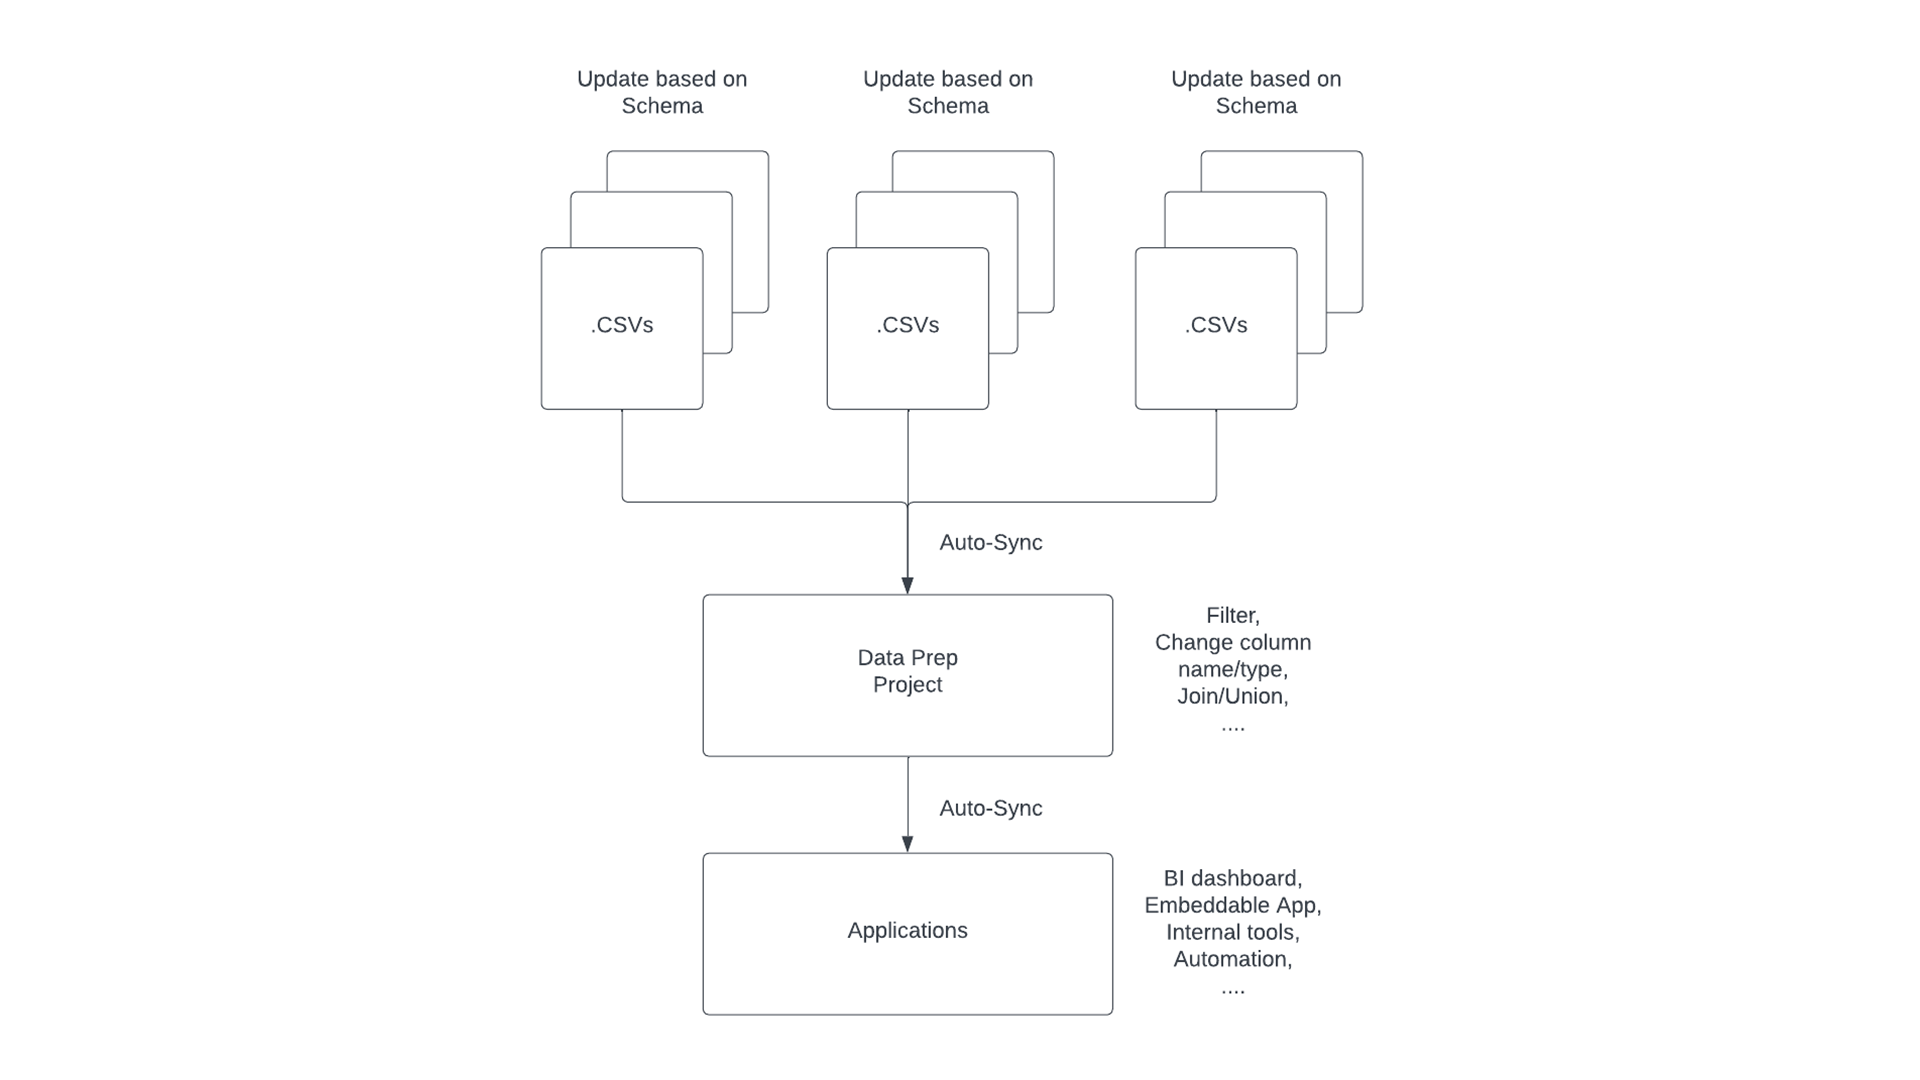
Steps to build a database with CSV files
- Upload and convert multiple CSV files as a resource (Batch CSV)
- Import your CSV/xlsx resources to a Data Prep project
- Transform your tables into an appropriate format and schema
- Add new CSV files to update your table
For smaller projects, CSV is a great format for storing data. But what if you have a lot of them? Storing them all on your local computer can be a hassle. First, they can take up a lot of space. Second, they will need to be stored orderly with a naming convention. More importantly, many of these data files would need to be combined into one giant table. What is the best practice for this?
In essence, you should build a relational database for these files. A relational database is a database that divides data into linked tables that have shared data points. These shared data points allow us to combine information and create novel tables or views with one simple query operation. It offers a more robust way to organize and manage your data. Popular types of relational databases include MySQL and PostgreSQL.
Below, we will be discussing a few common methods of building databases with CSV files.
Methods to build a database
1. Using database command line interface
One way to build a database is to directly write SQL in the database command line interface. The first step is to create a table and design its schema for your database, including column names, data types, primary keys and foreign keys.
Then, load CSV files to your table.
Now, your data is stored in the table you just created and you can write a query to examine if the data is imported successfully.
Although writing SQL is optimal to process large amounts of data in a time efficient manner, this method requires the users to have prior knowledge in SQL and data infrastructure. Therefore, this method is not suitable for users of different skill levels.
2. Using database GUI tools
Another way is to use a database GUI tool, such as MySQL workbench or SQL Server Management Studio. A database GUI tool is a visual database design tool that provides the interface to create and work with databases more easily. Generally, they have built-in features that allow you to build databases from CSV files with a few clicks and without writing codes.
Take MySQL workbench as an example. After connecting to your server and creating a new database, you can use the Table Data Import wizard and follow its instructions to import CSV files. During the process, you can manually adjust input text qualifiers and column width for every column to create the desired database.
3. Using ETL tools
ETL stands for extract, transform, and load. Companies use ETL pipelines to connect various data sources with databases. ETL tools such as Hevo Data and Skyvia act as middleware that offers users the ability to transform and cleanse data before integrating it into your database. If your data is not only from CSV files or your data needs to be cleaned, ETL tools can be good alternatives to load data into your database.
4. Cloud DB management systems
Cloud DB management systems, such as Acho, are recently a popular option to create a database. Unlike the previous three methods, the cloud DB management platform doesn’t require you to create a database first. When you upload your CSV files to the platform, it automatically hosts a server and creates a database for you. With the advantage of GUI and cloud computing, you can manage and access your database easily and quickly.
Build a database with CSV files without codes
Building a robust relational database takes time and effort. But you can do it within minutes using Acho. I will now show you how you can convert your CSV files into an SQL database that can support many applications in four simple steps.
1. Upload and convert multiple CSV files as a resource
- Upload multiple CSV files (of the same schema) as a Batch CSV resource on Acho
- Make sure the column names in all files are the same for each Batch CSV resource (don't worry, you can unify the columns later on).
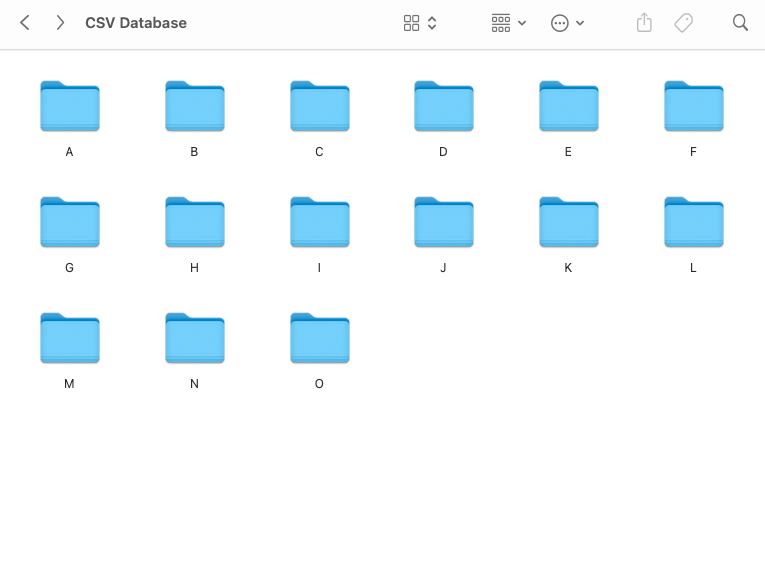
First, import your files to Acho Studio as a resource. Here I have a folder called “CSV Database”. It contains 15 folders named by alphabets. Each folder contains CSV files of a particular schema (column set) so we can use them to update the files later on.
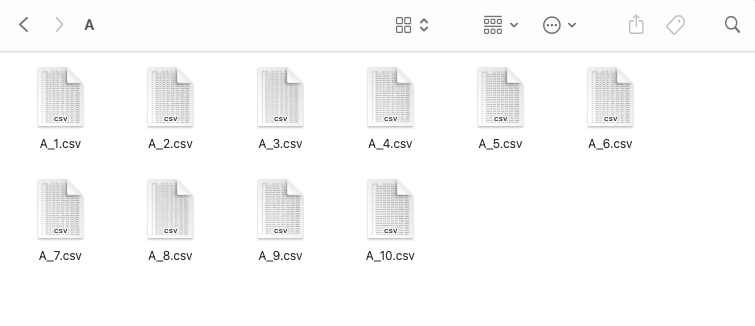
Within the first folder (schema A), I have 10 files here.
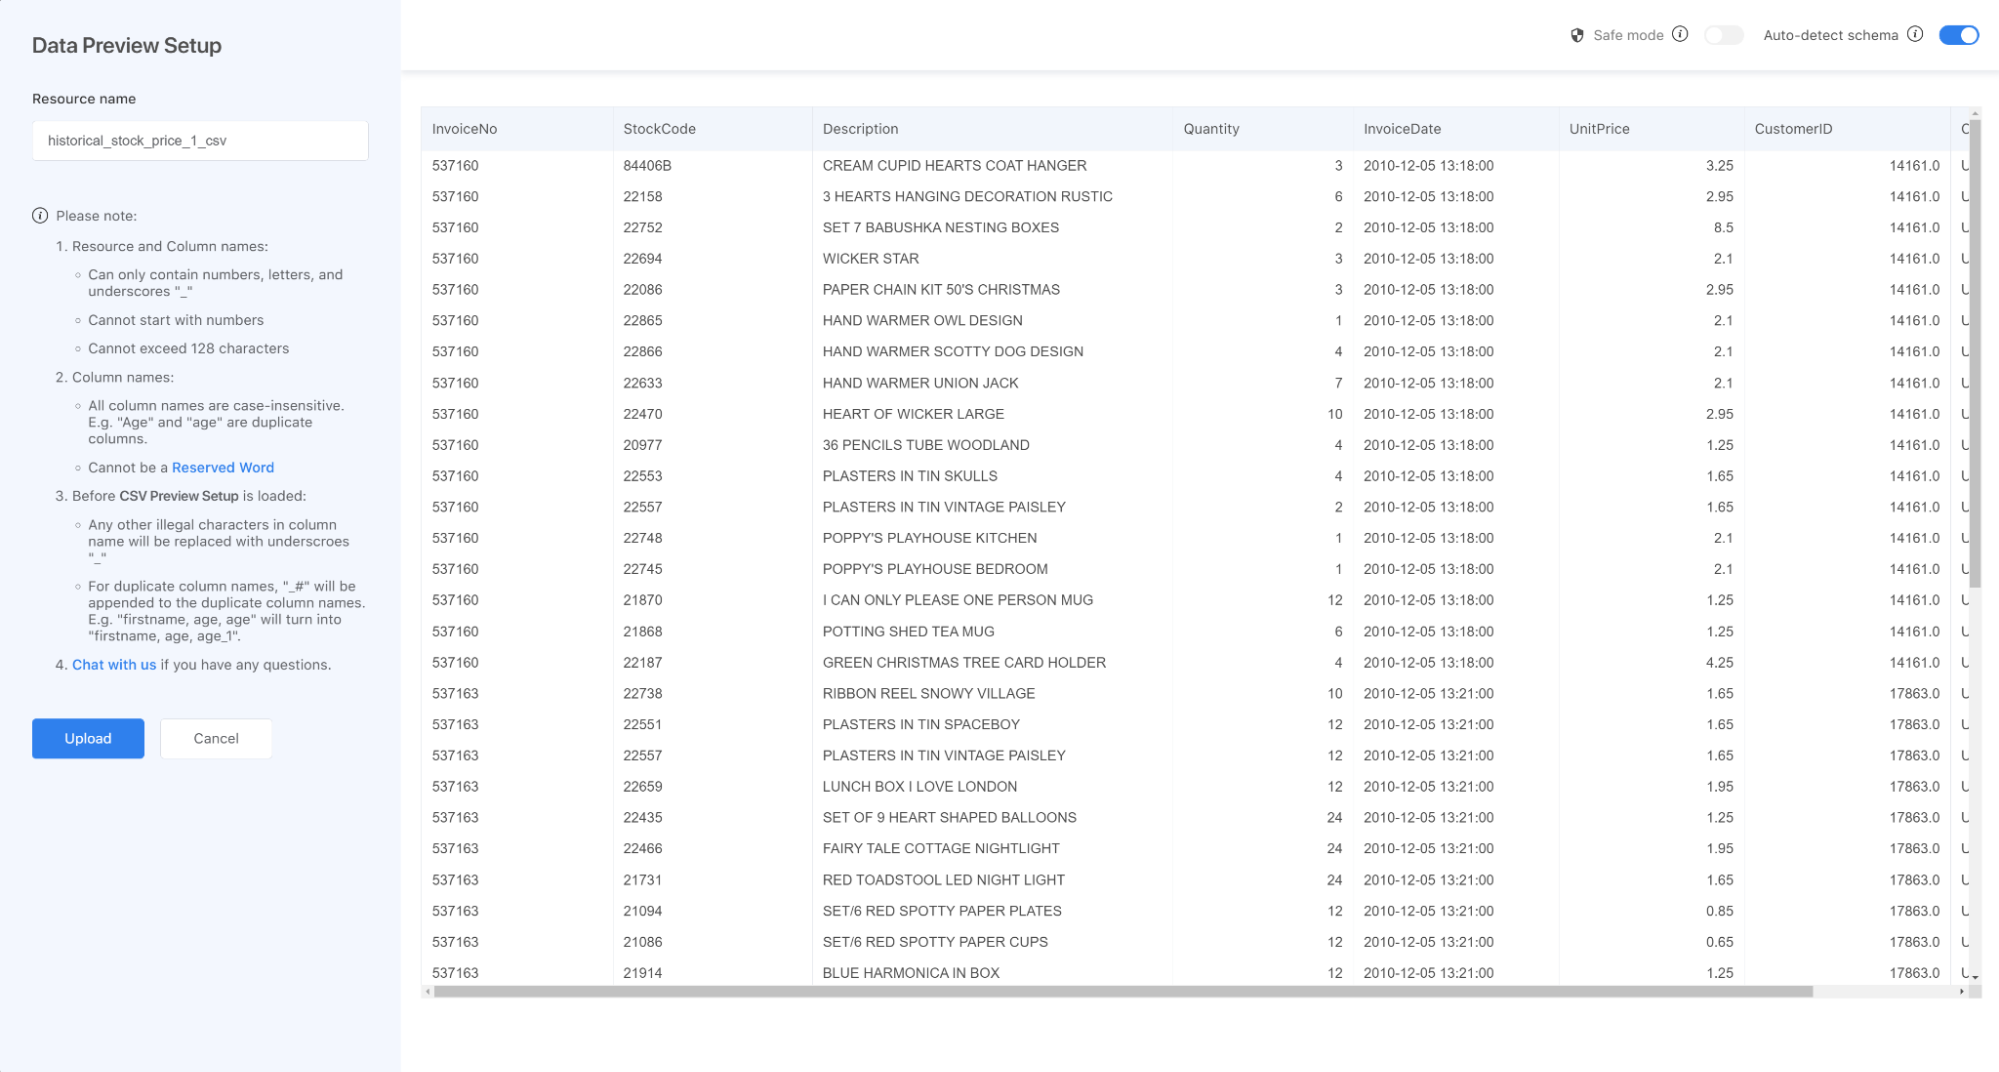
Then go on to Acho Studio’s resource page and select “Batch CSV” for importing and converting to your resource. Be aware that only .csv, .tsv, and .txt files are supported at the moment.
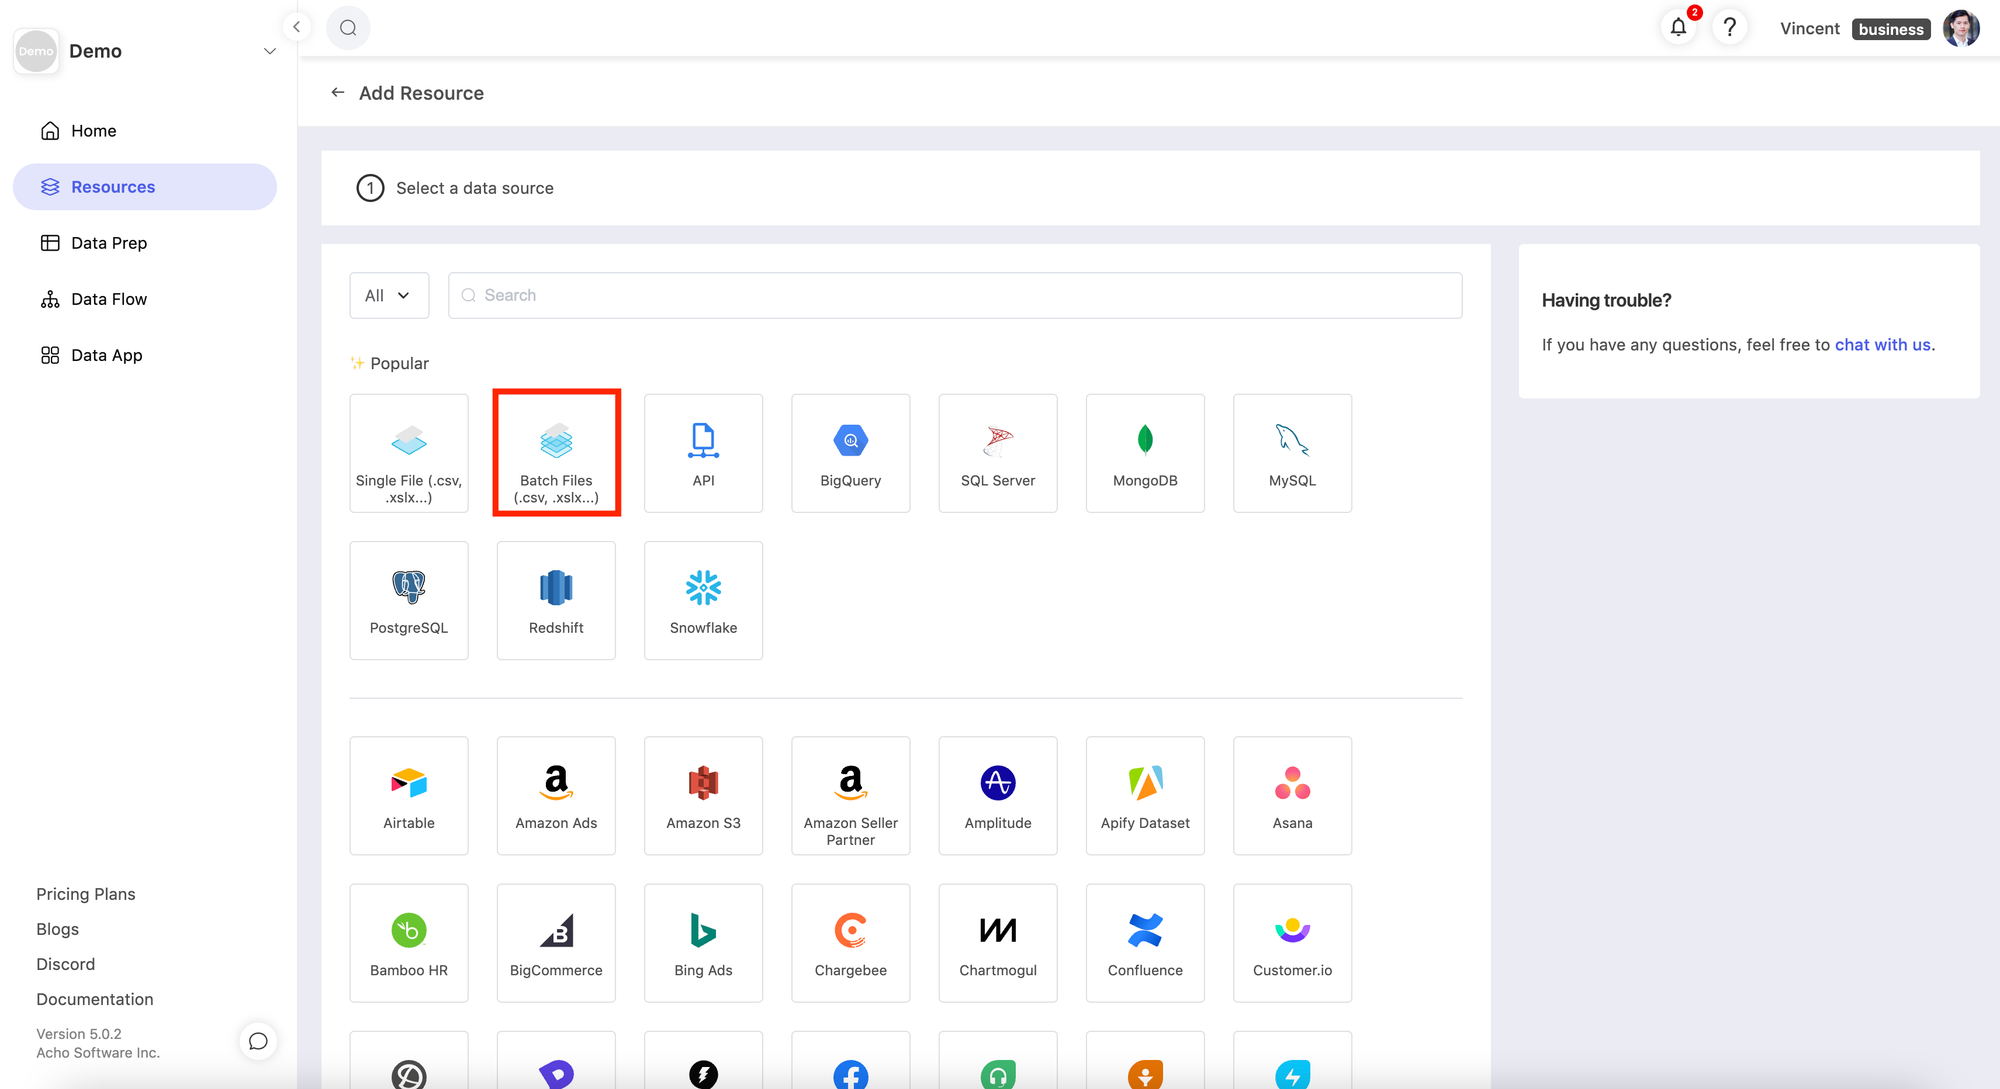
If they all have the same column name and correct values for each column, you should see a preview page with a sample of your files like this. (Note: If all of your files don’t have a header row, remember to switch to “Safe Mode” to add a header)
2. Import your Batch CSV resources to a Data Prep project
- Create a project, and import your Batch CSV resources into it
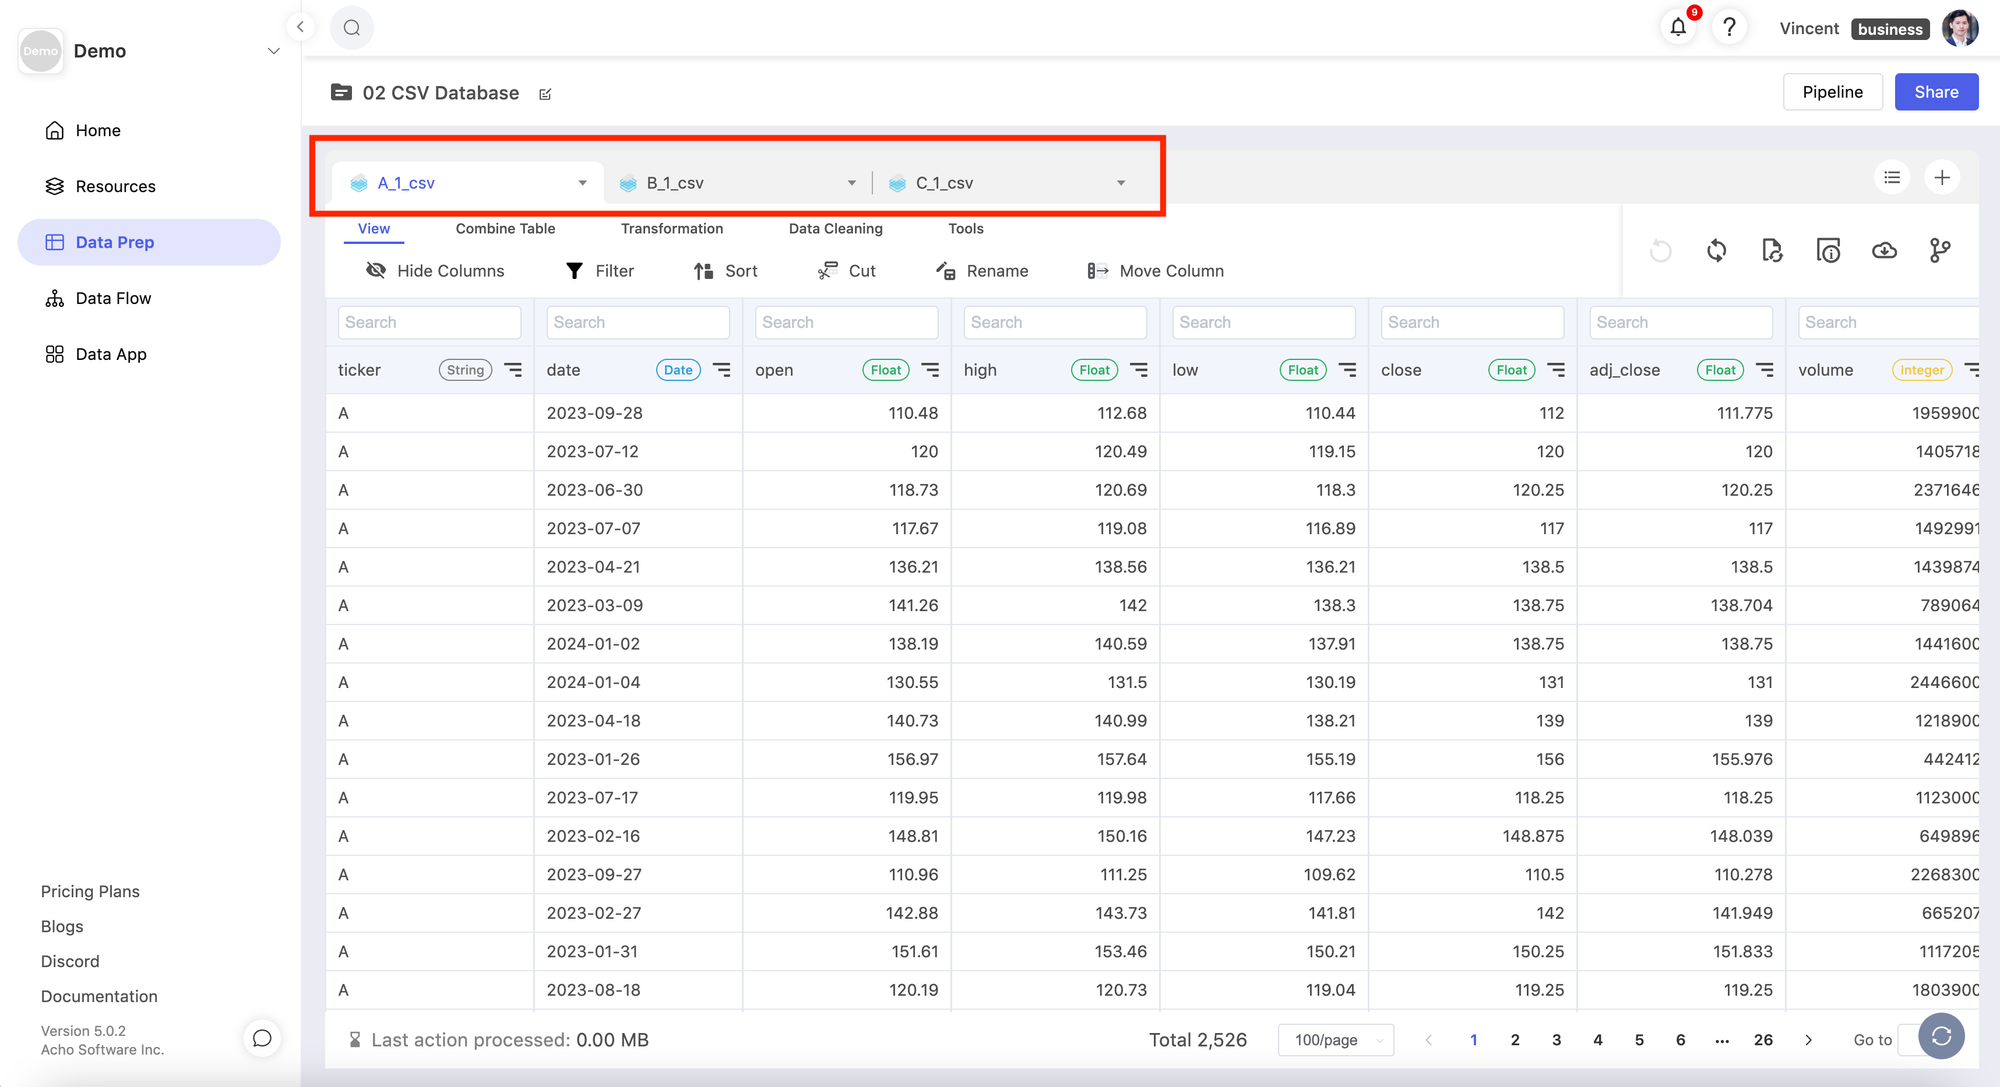
Once you have successfully uploaded the .csv batch files as a resource, you can now create a project to access them. As you can see, you can "view" multiple Batch CSV resources all together in one project.
Once these "CSV batches" are opened in the same Data Prep project, you can now combine, and unify them to build a new "Master Table" to support your dashboard, application, and other use cases.
3. Update and transform your tables with new CSV files
- Go back to the "Batch CSV" resources, Click the “File Management” button next to your Batch CSV resource.
- Upload new files to the Batch CSV resource
- Go to your project, click "sync" and "refresh" and update your tables.
It is simple to upload your table with new CSV files. You can simply go to the resource page and click the “File Management'' button next to your Batch CSV resource. Here you can upload the new files and the system will automatically merge the new files into the current resource and aggregate all the records based on the column names. There is no limit on how many rows you can add to the resource. All the records are stored in a relational database on the cloud, so it’s pretty easy to transform, cleanse, and update them. (Notice that all news files should have the same column names as the current resource.)

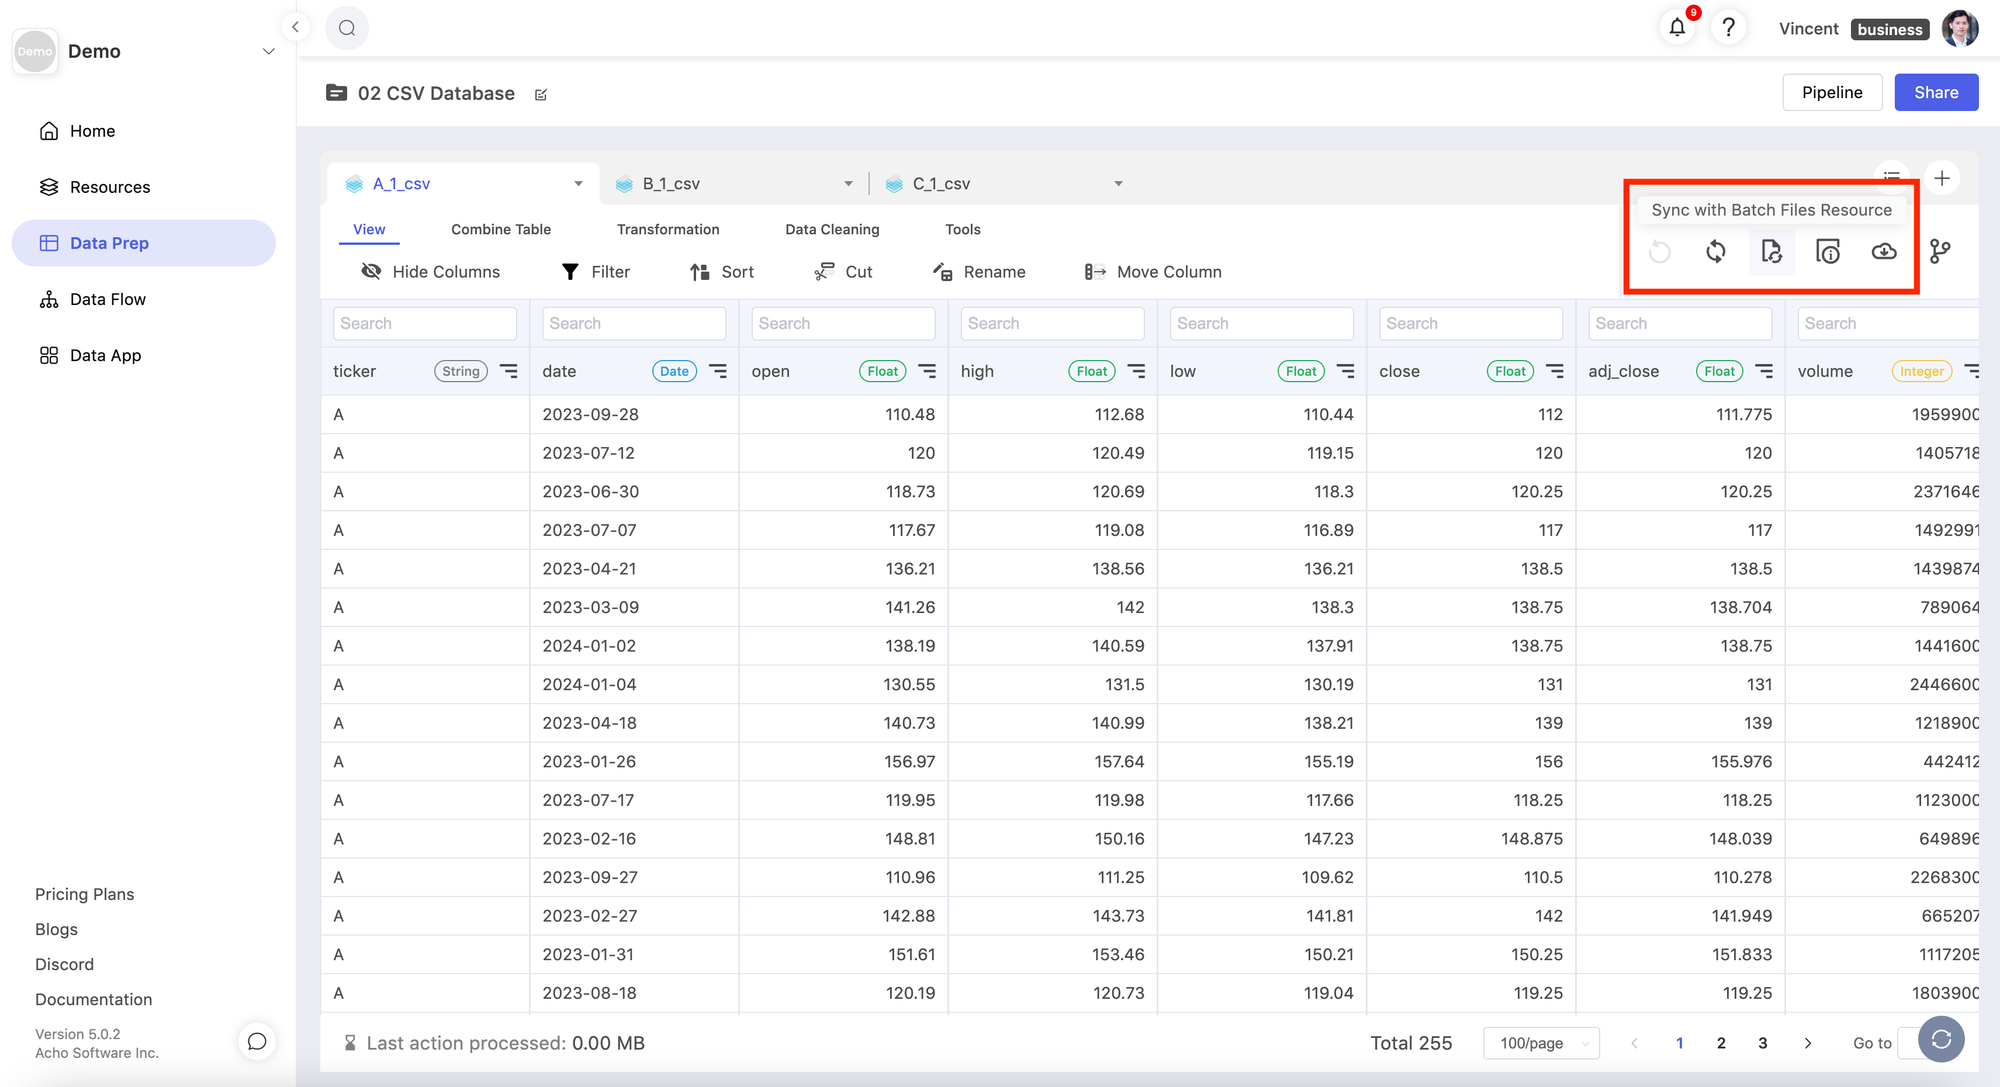
Then, go to the project where you imported the Batch CSV resource, and click the “Sync with the Batch CSV resource” button. Now, the system will retrieve the latest records from the resource.
If your new data files have different column names or you want to expand your tables horizontally, you can upload the new file as a new resource and check out this article to merge them into your current table by using the “Union” or “Join” action.
- Build the "Master Table"
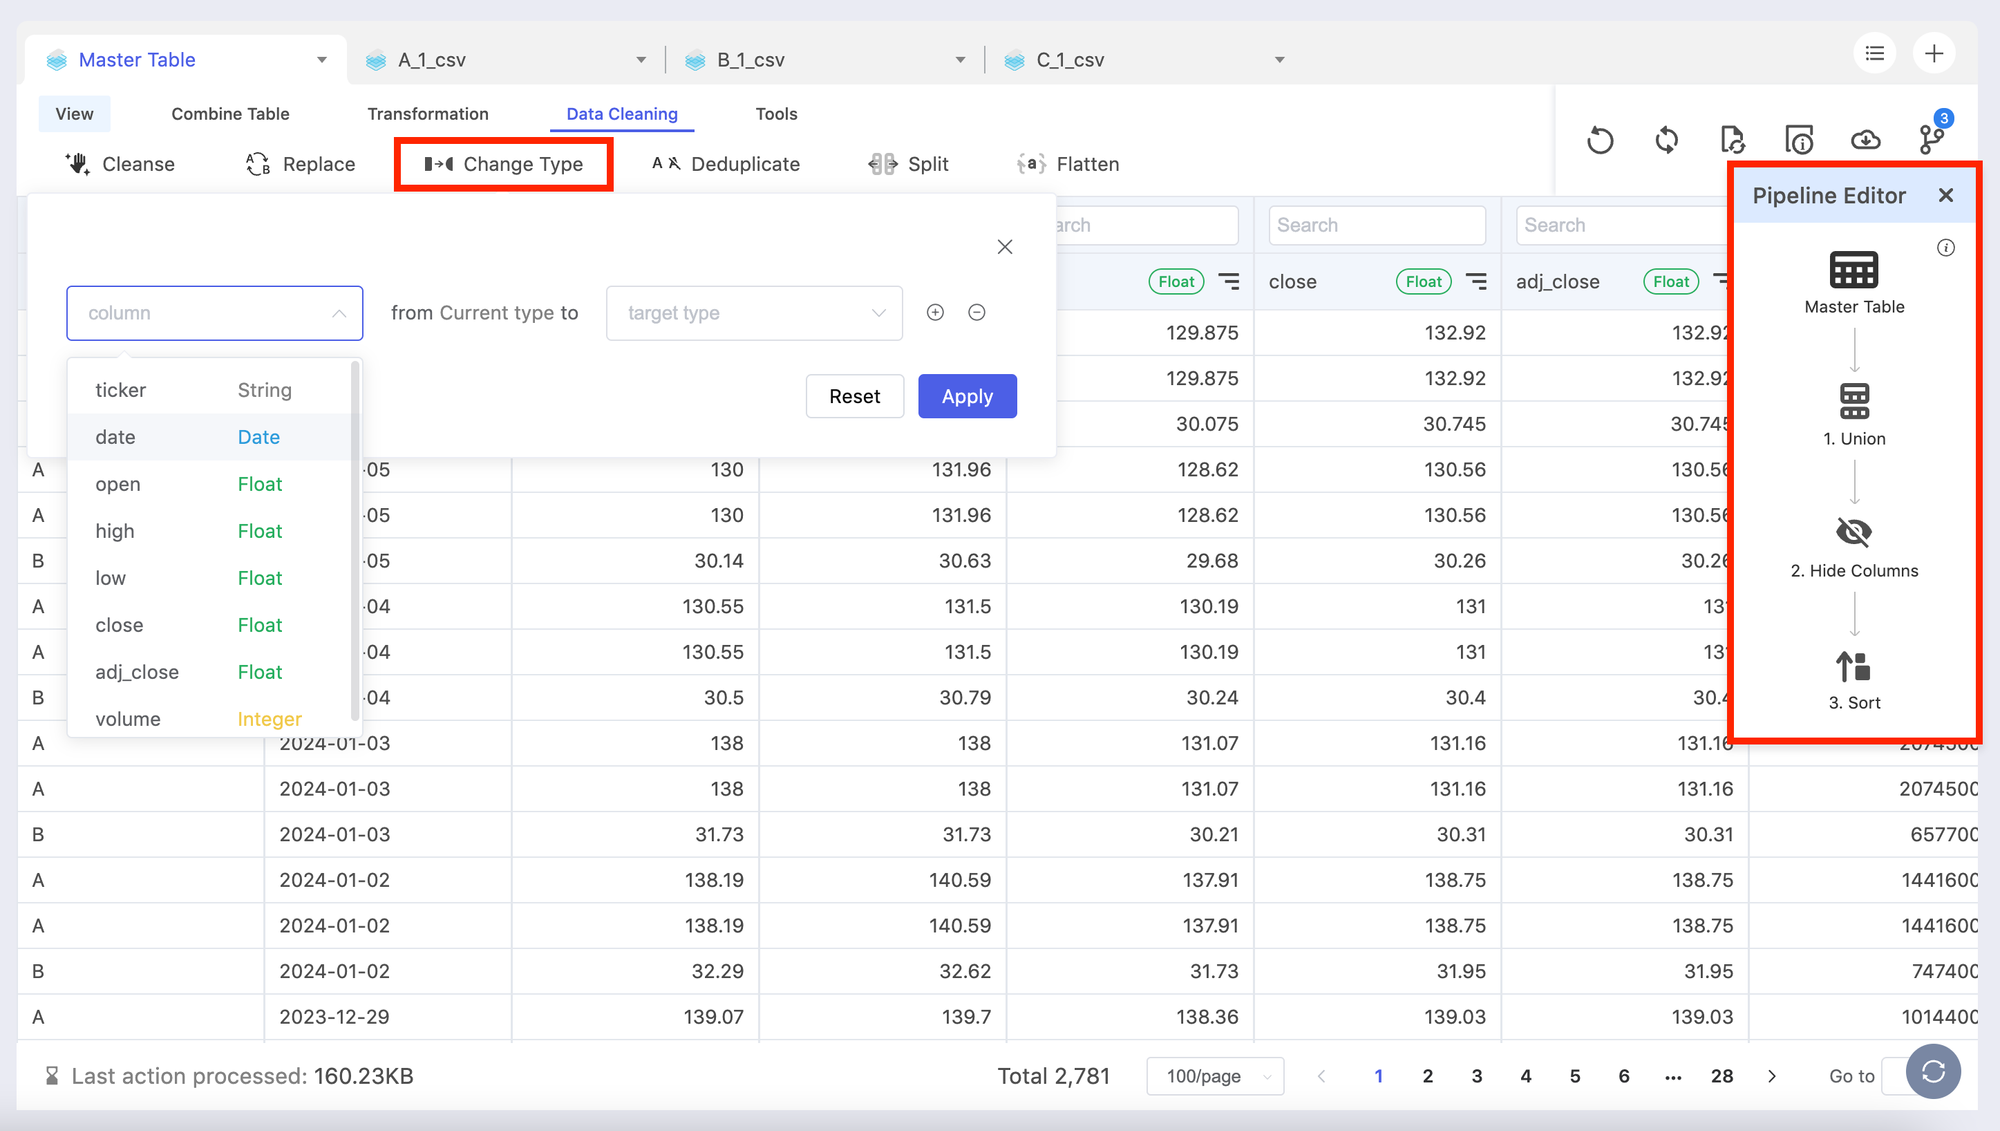
This step is crucial if you want to combine the CSV batches of different schema. By "copying" one of the existing tables as a "Master Table" with a pipeline, you can now "connect" the subsidiary tables with the Master Table.

During this process, you can conduct a series a data manipulations such as hiding certain columns, changing the column names/types, and more so you can have a dynamically updated Master Table that can
- Support applications such as dashboards, embeddable widgets on websites, and internal systems
- Update based on the subsidiary tables imported through the "Batch CSV" resources.
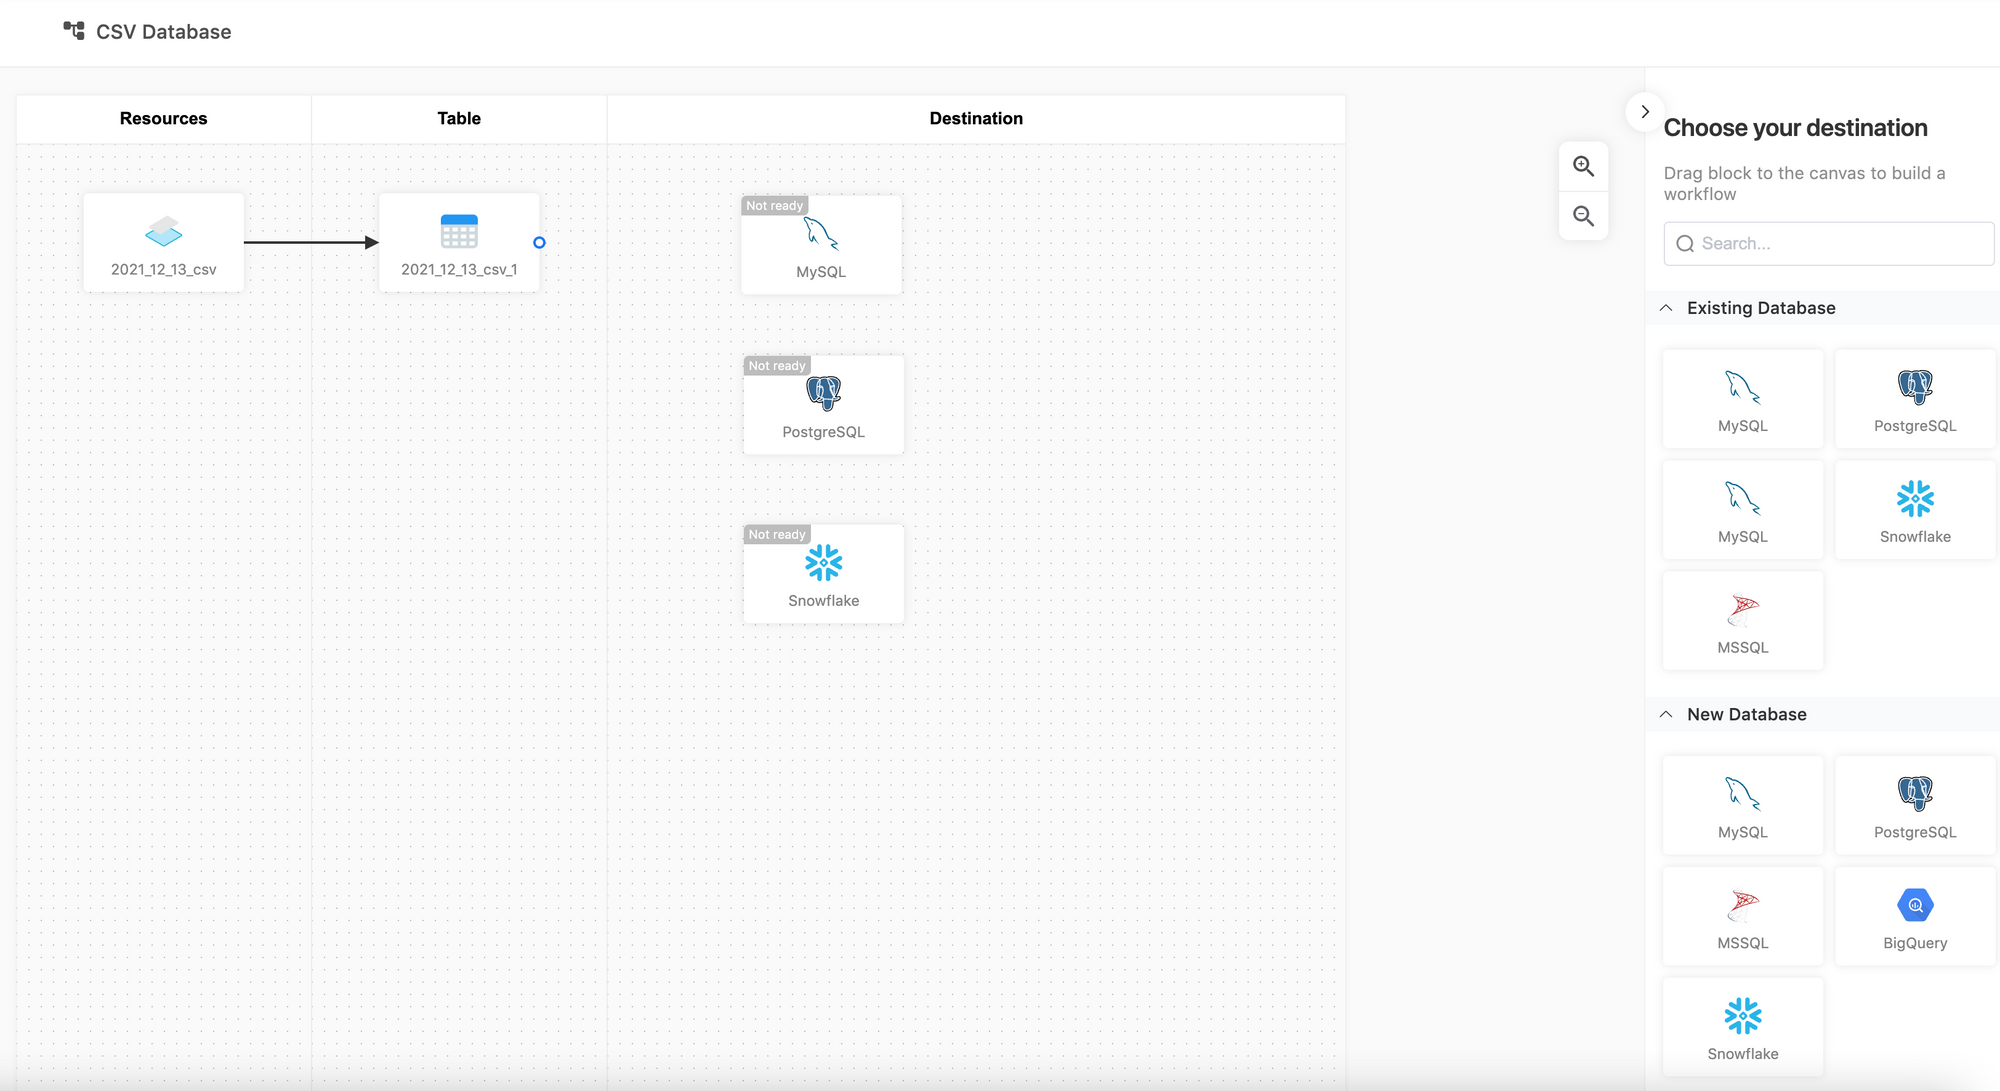
- Use the CSV database (master table) in applications (optional)
Once the data is imported and built out in the project table, you can use the "Workflow" feature to export the table to a production database such as MySQL, PostgreSQL, BigQuery, and more. By verifying the credentials, you can write the table data to the database automatically.
The advantages of building and using relational databases
First, relational databases enable you to see the relationship between different parts of your data more easily. Data can be divided into tables or it can be combined (using “joined” or “unioned”) using SQL-based actions that include simple math operations.
Second, relational databases offer superior data management with greater consistency and flexibility. Flat CSV or other types of files can become unmanageable, and inaccessible. A relational database allows you to enforce data types using schemas thus reducing many potential errors. Relational databases also offer greater flexibility since you can generate more complex data from relatively simple tables using complex queries.
Third, relational databases solve the problem of data redundancy: a good relational database is designed around minimizing data duplication and inconsistent dependencies, through a process called “normalization”. Normalization is the process of organizing the data in your database and involves both creating tables and defining the relations between them. Data normalization helps rid of anomalies that may slow down and negatively impact the analysis of data, therefore a well-functioning and organized database needs to undergo normalization to be successfully analyzed for data insights.
Fourth, relational databases have become the industry standard and database management systems (DBMS), since they are easier to implement and administer. Most databases used today are based on the relational model; it typically offers an advanced set of features that you’d want for any database such as backups, failover, and access management.
Hope this article helps. Contact us in the chatbox if you have any questions.
- Schedule a Discovery Call
- Chat with Acho: Chat now
- Email us directly: contact@acho.io
Related articles:
>>
How to create a searchable database without writing codes?
>>
How to share a database with someone?
>>
How to manage a database through metadata?