Common belief is that it’s impossible to build an entire app using only SQL. SQL (Structured Query Language) is a language used to communicate with relational databases. It is used to retrieve, manipulate, and store data within a database. To build an app, you would need to use a programming language such as Python or JavaScript to handle the logic and user interface of the app, and then use SQL to interact with the database.
However, this is no longer the case as headless and event-driven applications are gaining traction in the world of software development. What separates these new technologies from the traditional methods of building apps are the flexibility, scalability and accessible functionality when it comes to development.
Of course, building an application is a complex task with many different approaches a developer can adopt. For a general web application, there’re 4 mainstream approaches. Each would of course require SQL as the main way of communicating with the backend database.
01 Using code frameworks
There are many frameworks available for developing web applications, and the best one for a particular project will depend on the specific requirements of that project. Some popular frameworks include:
- React.js: it’s JavaScript library created by Facebook for building user interfaces. It uses a component-based approach, where UI is built as a collection of reusable components. React.js uses a virtual DOM, which improves performance by reducing the number of DOM manipulations. It also uses JSX, a syntax extension for JavaScript, which allows developers to write HTML-like elements in JavaScript.
- Vue.js: it's a progressive framework for building user interfaces. It was created by a former Google employee, and it's known for its simplicity and flexibility. Vue.js uses a template-based syntax, which makes it easy to understand for developers with a background in HTML and CSS. It also provides a powerful set of tools for building complex web applications.
- Ruby on Rails: A framework for building web applications using the Ruby programming language. It follows the "convention over configuration" principle, which allows for rapid development of web applications.
- Express.js: A framework for building web applications using the JavaScript programming language. It is a minimalist framework that can be used with a variety of different JavaScript libraries and frameworks, such as React or Angular.
- Python Django: A framework for building web applications using the Python programming language. It follows the "batteries included" principle, which provides a lot of built-in functionality, such as an ORM and an administrative interface.
- Python Flask: A micro-framework for building web applications using the Python programming language. It is simple and lightweight, making it a good option for small or simple projects.
- Spring: A framework for building web applications using the Java programming language. It is a comprehensive framework that provides a wide range of functionality, such as security, data access, and messaging.
- Laravel: A framework for building web applications using the PHP programming language. It is known for its elegant syntax and built-in tools for common tasks, such as authentication and routing.
The general workflow for developing an app with frameworks is as follows.
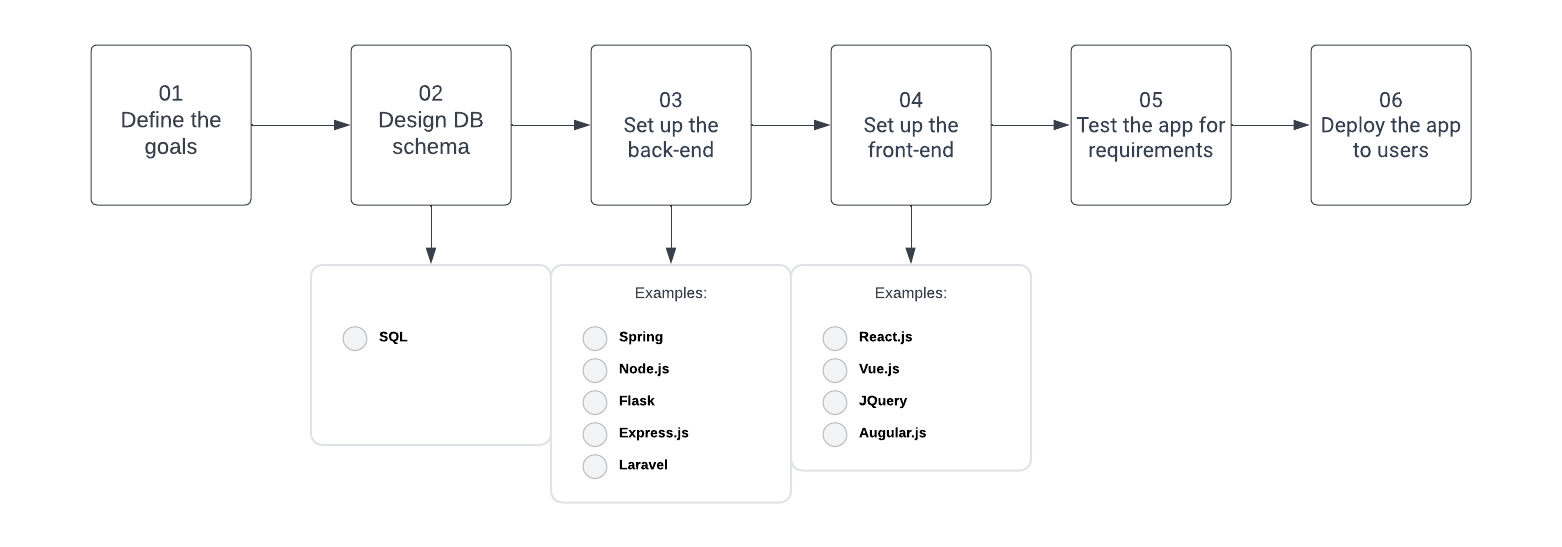
As you can see, SQL is very much needed for designing a database schema prior to all front-end and back-end setups. This of course is a high-level overview of the process. There are many detailed considerations that need to be taken into account depending on the complexity and size of your project.
02 Using No-code app builders
Building a web app with a no-code app builder generally involves the following steps:
- Choose a no-code app builder: There are many no-code app builders available, such as Webflow, Bubble, Appgyver, and many more, each with different features and capabilities. Choose the one that best fits your needs and has the features you need for your app.
- Plan and design your app: Before you start building your app, it is important to plan and design it. This includes determining the features and functionality that you want your app to have, as well as the layout and user experience.
- Drag and drop elements: Most no-code app builders use a drag-and-drop interface, which allows you to add and arrange different elements such as text, images, buttons, and forms, without writing any code.
- Connect to data: Many no-code app builders allow you to connect to data sources such as databases, spreadsheets, or APIs. This allows you to create dynamic apps that can retrieve, display, and update data in real-time.
- Preview and test your app: Most no-code app builders have a preview or test mode that allows you to see how your app will look and function before you launch it.
- Publish your app: Once you're satisfied with your app, you can publish it to a web server, or deploy it to a hosting platform, such as Heroku, Firebase, or DigitalOcean.
Building an app with a no-code app builder is relatively easy, fast and affordable, but it may have some limitations in terms of functionality and scalability compared to building an app from scratch with a programming language.
03 Using BI dashboards
It is possible to build an app with BI dashboard tools. BI dashboards are designed to help businesses visualize and analyze data, and they can be integrated into an app to provide users with real-time data insights and analysis.
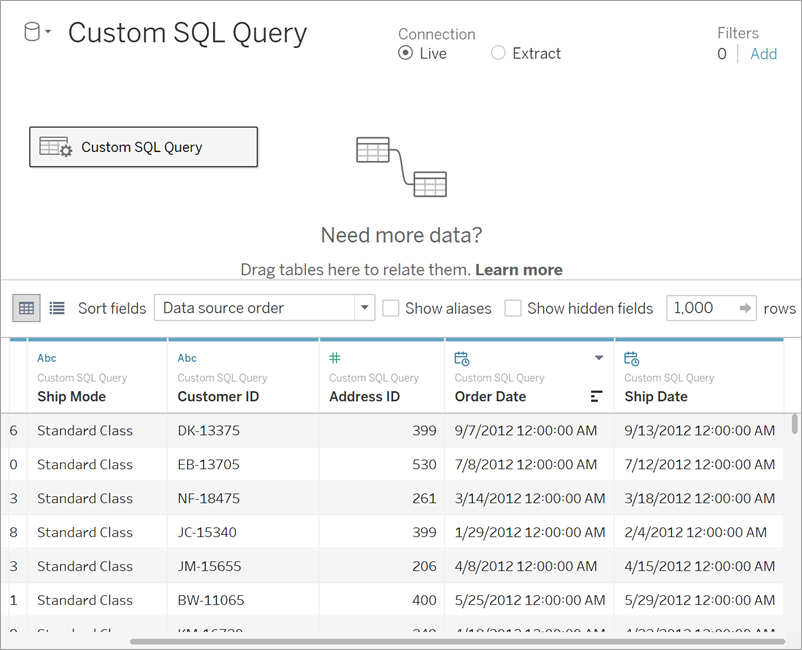
- Connect to your SQL data: Take Tableau as an example, you can connect to your SQL server by selecting "Connect to Data" from the start page or the Data menu. You will need to enter the server name, database name, and credentials to connect to your SQL server.
- Create a data source: Once you are connected to your SQL server, you can create a new data source by selecting the tables you want to use for your app. This is also where you can write certain logics to slice and dice the data before they’re visualized.
- Create visualizations: A BI tool typically provides a wide range of visualization options, such as charts, maps, and dashboards. You can use these visualizations to represent your data in a way that is easy to understand and interact with.
- Publish your app: Once you have created your visualizations, you can publish them to Tableau Server or Tableau Online to share them with others. You can also embed your visualizations in a website or mobile app using Tableau's web embedding feature.
- Integrate with other data sources: With Tableau you can combine data from multiple data sources, such as Excel, CSV, and other databases, and you can use data blending to join data from multiple data sources in a single visualization.
In general, BI dashboards are very good for charts and visualizations. When it comes to providing critical services such as complex interactions, user communication (email, alerts), and data services (collection, modeling, automation), they really fall short compared to a more complete application builder.
04 Using a low-code app builder
Low-code tools and no-code tools both aim to make app development more accessible to a wider range of people, including those without a background in programming. However, there are some key differences between the two:
Flexibility: Low-code tools generally offer more flexibility than no-code tools, by allowing developers to write code when necessary. This means that developers can build more complex or customized apps, or add functionality that is not available in the visual editor.
- Scalability: Low-code tools are generally better suited for large or complex projects because they can handle more data, more users, and more functionality than no-code tools.
- Speed: Low-code tools can be faster than no-code tools because developers can write code to automate repetitive tasks or add functionality that is not available in the visual editor.
- Integration: Low-code tools may integrate with more external systems than no-code tools, making it easier to connect to other technologies, such as databases, APIs, or third-party services.
- Cost: Low-code tools may have a higher cost than no-code tools, as they often require additional licenses, maintenance and support.
In summary, low-code tools are generally more flexible, scalable, faster, and better suited for complex projects, while no-code tools are generally easier to use, faster to implement, and more affordable. To summarize their core differences here, here’s a useful table
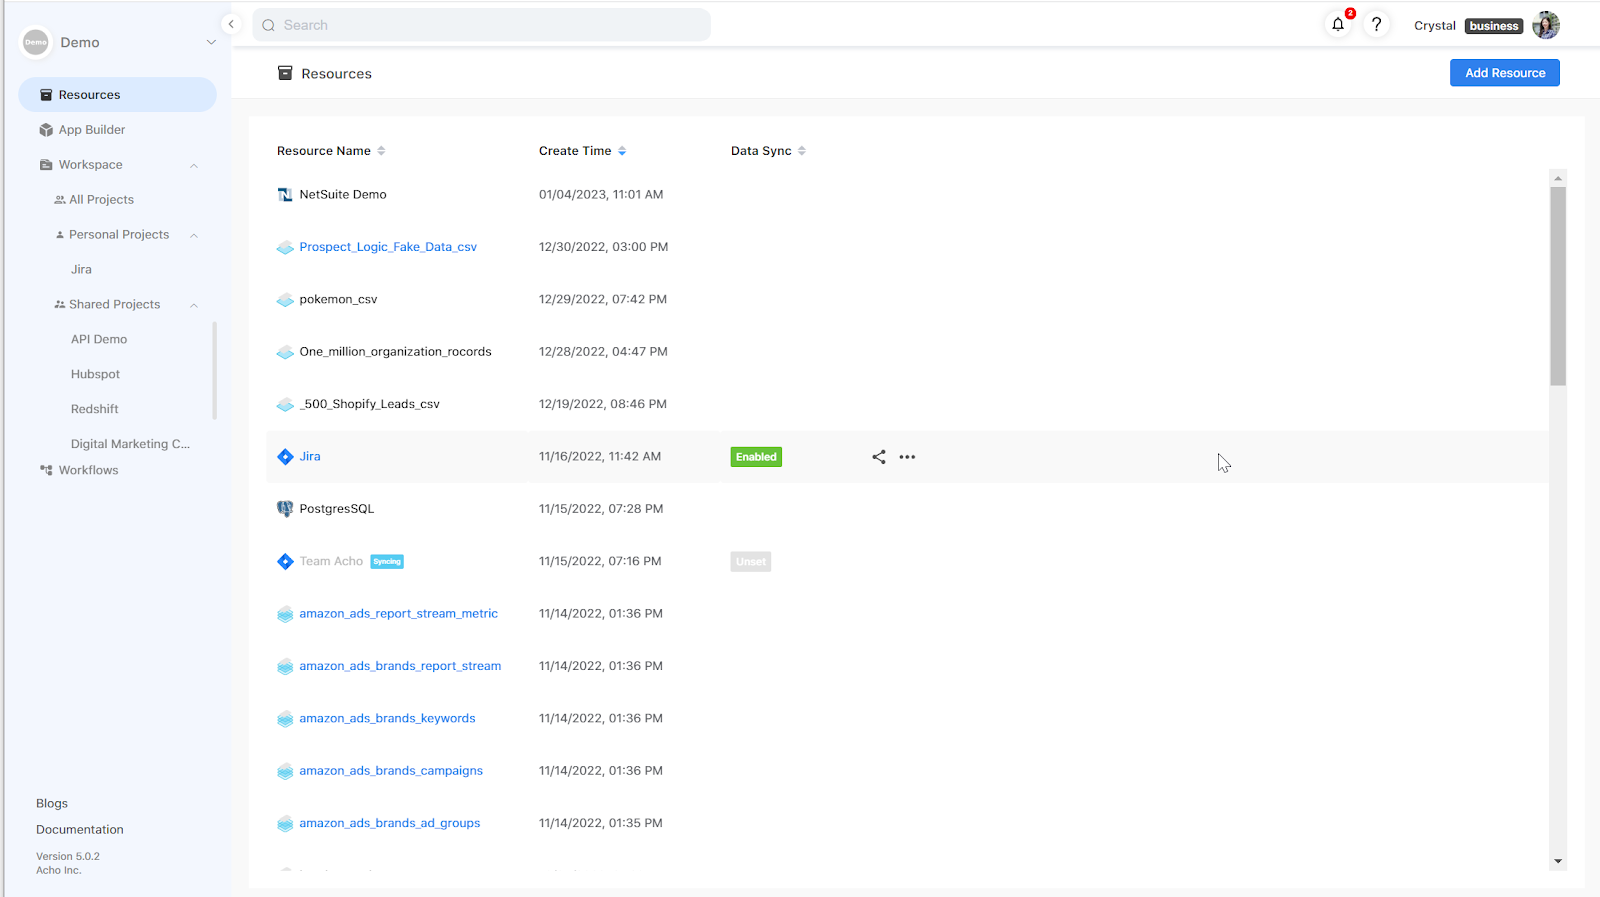
- Connect with a data source as a Resource
Most data sources are supported here including flat files (.csv, xlsx, .txt, json), databases (MySQL, MongoDB, Snowflake, BigQuery, etc), and Applications (API, CRMs, ERPs, and more)
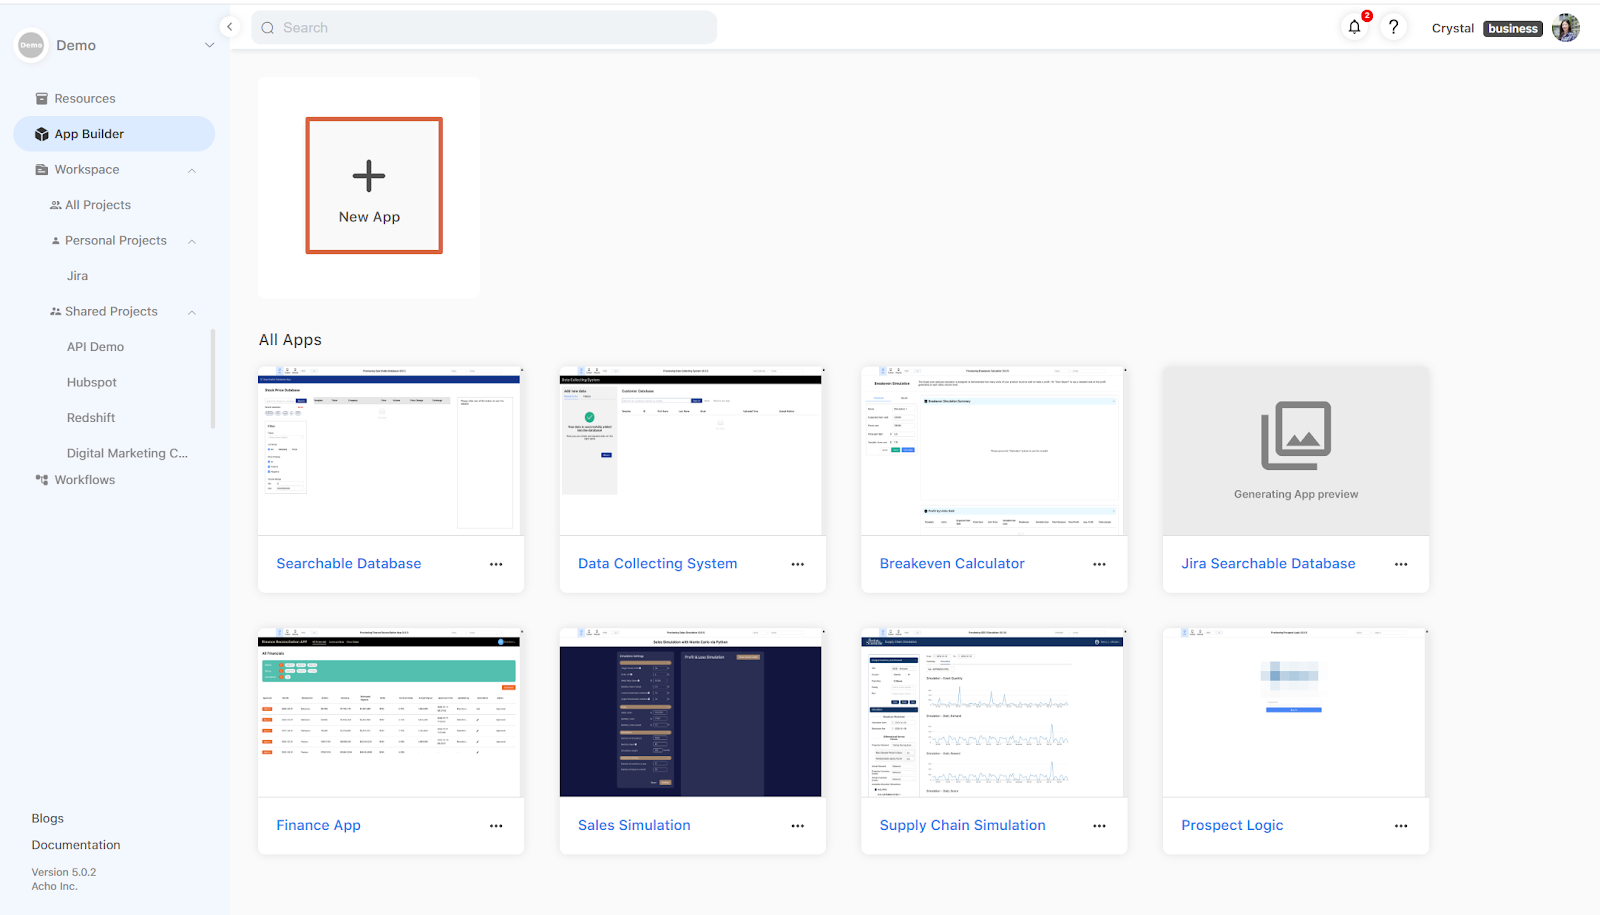
2. Go to App Builder and create a new app project
Simply create a new app project in the “App Builder” section. Each app project would contain one unique application with an unique root URL, set of databases, front-end components and services.
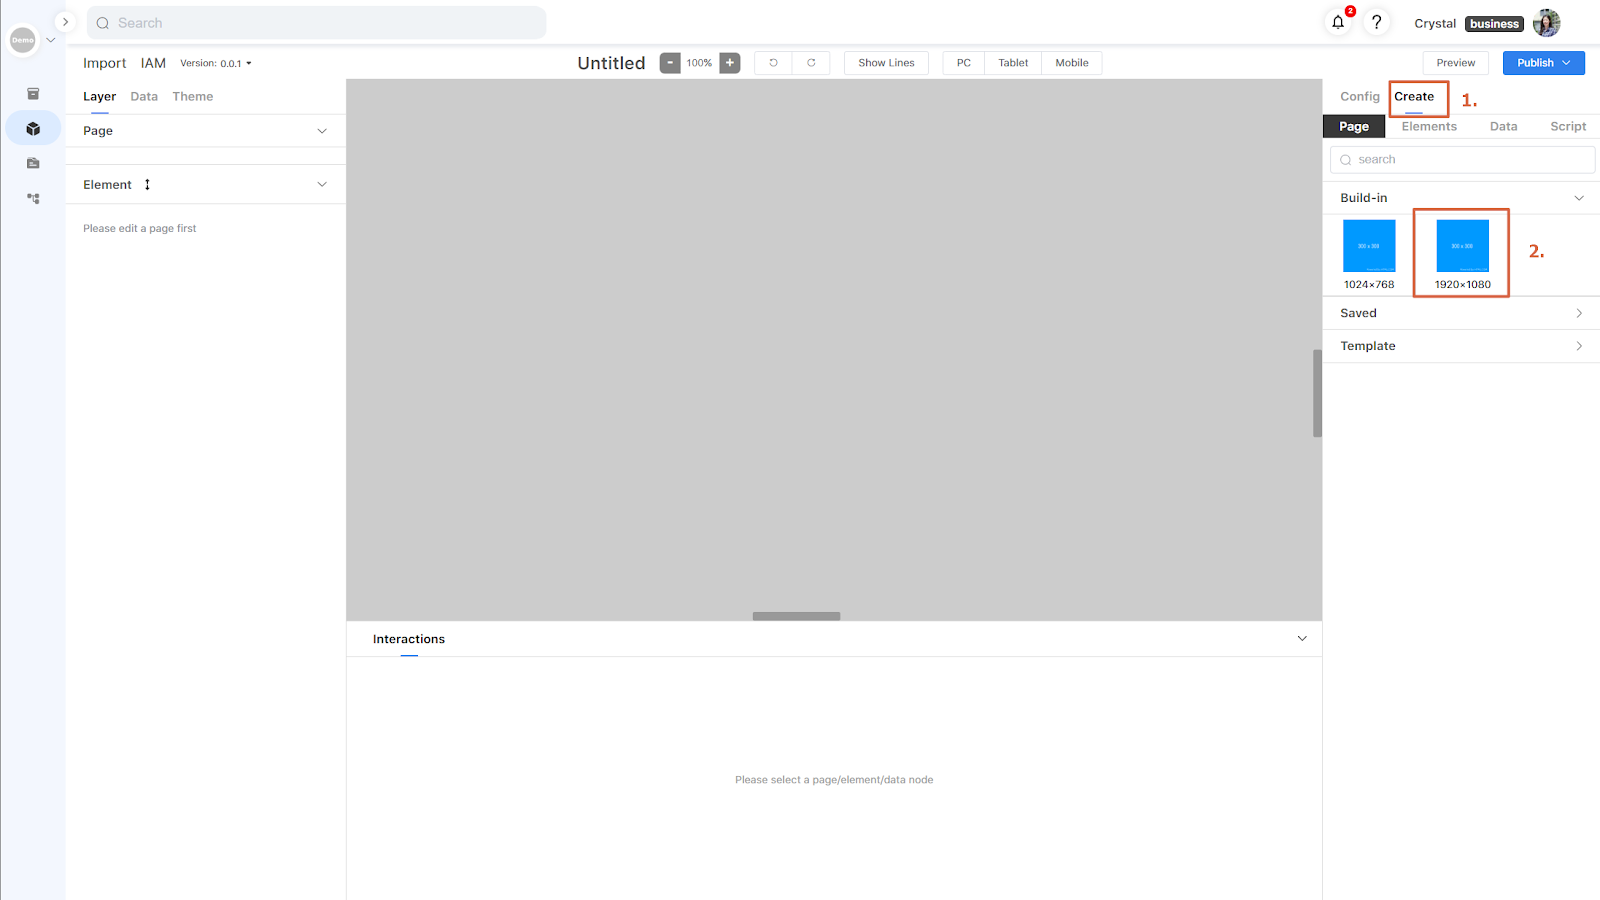
3. Switch to the Create tab on the right and drag the first page to the canvas.
“Create” would allow you to create pages, elements, data nodes and other essential components necessary to the app project.
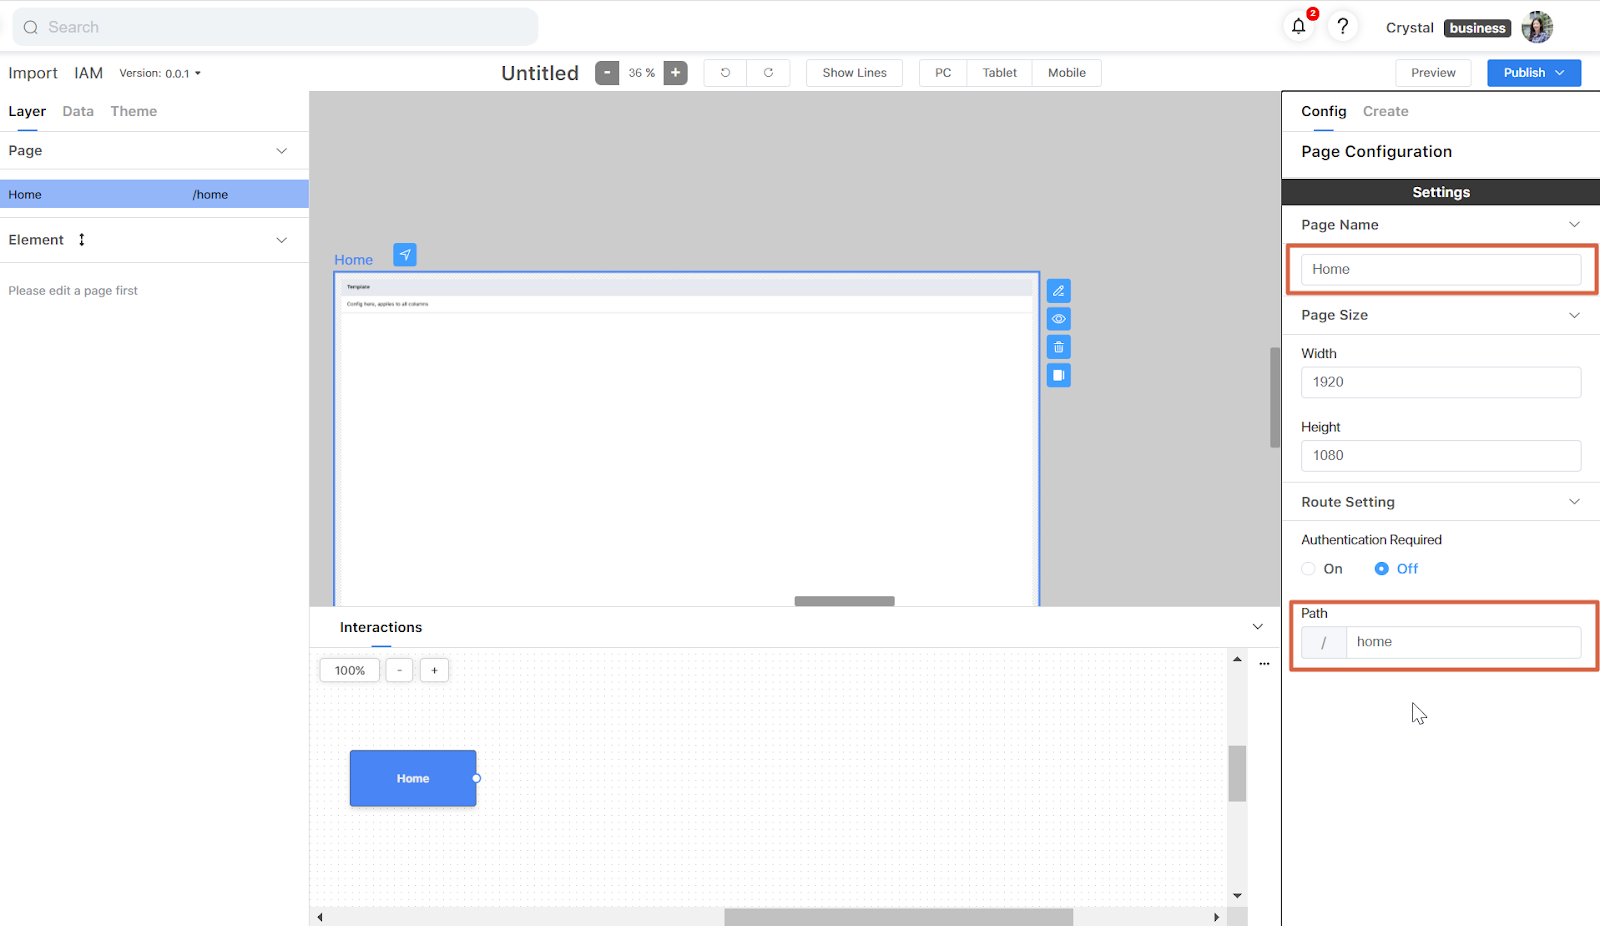
4. Click the page and configure the page name and path on the right.
This is important because it would set the default route that connect this page with other page or elements.
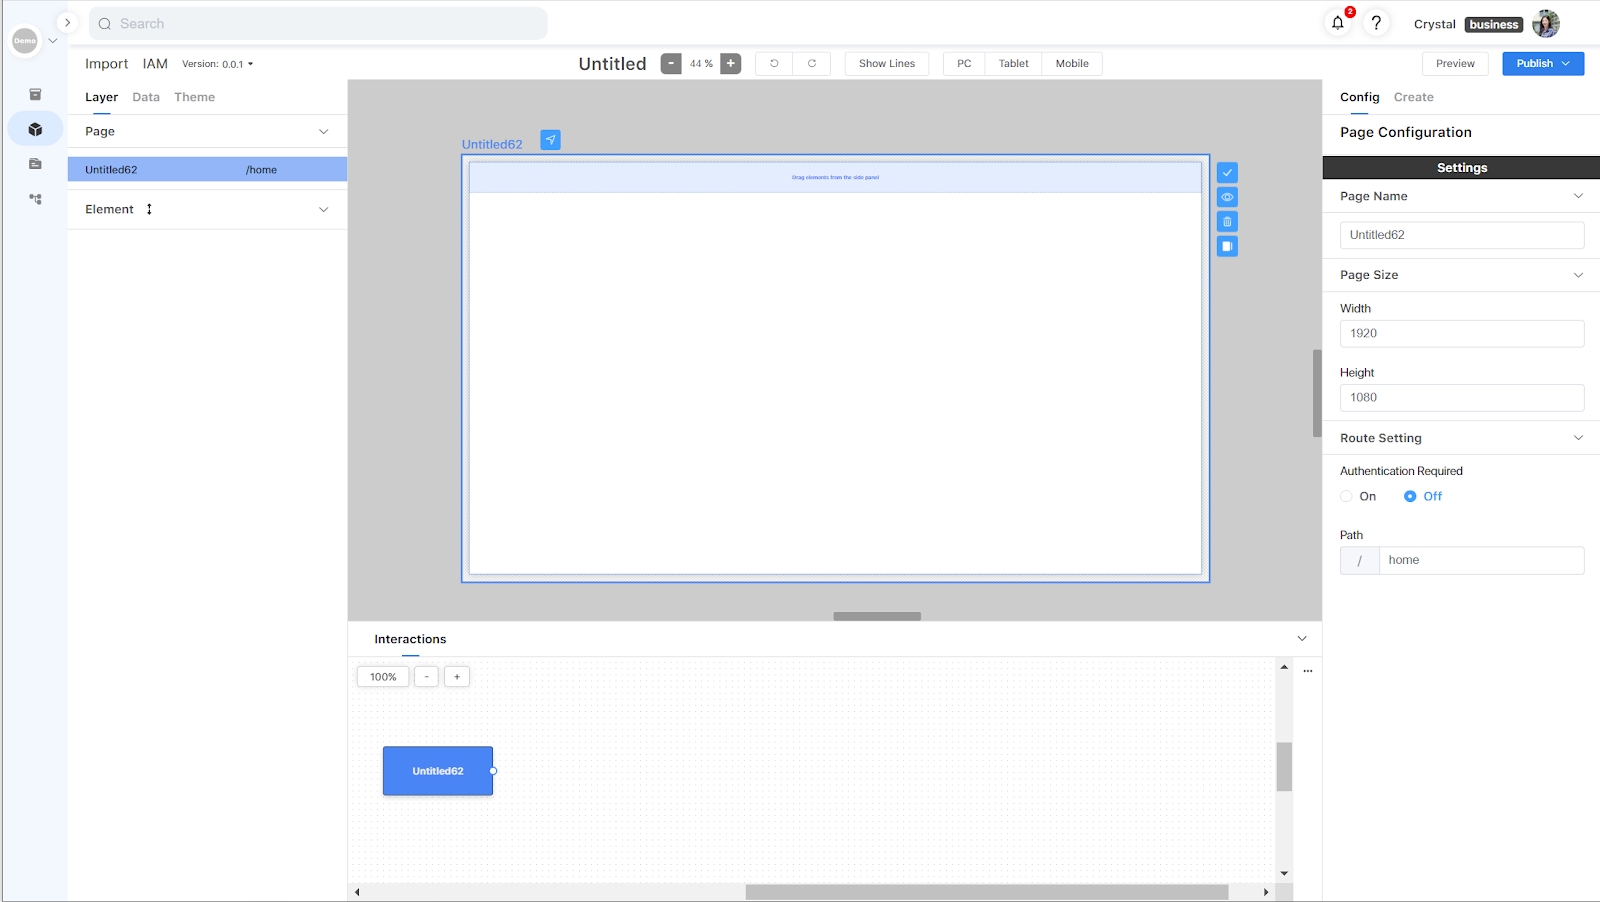
5. Double-click the page to enter editing mode.
Once double-clicked, you should be able to enter the editing mode and start creating elements!
6. In the editing mode, you can construct the page layout by dragging any element from the Create panel and dropping it on the page. In this example, drag a table element to the page.
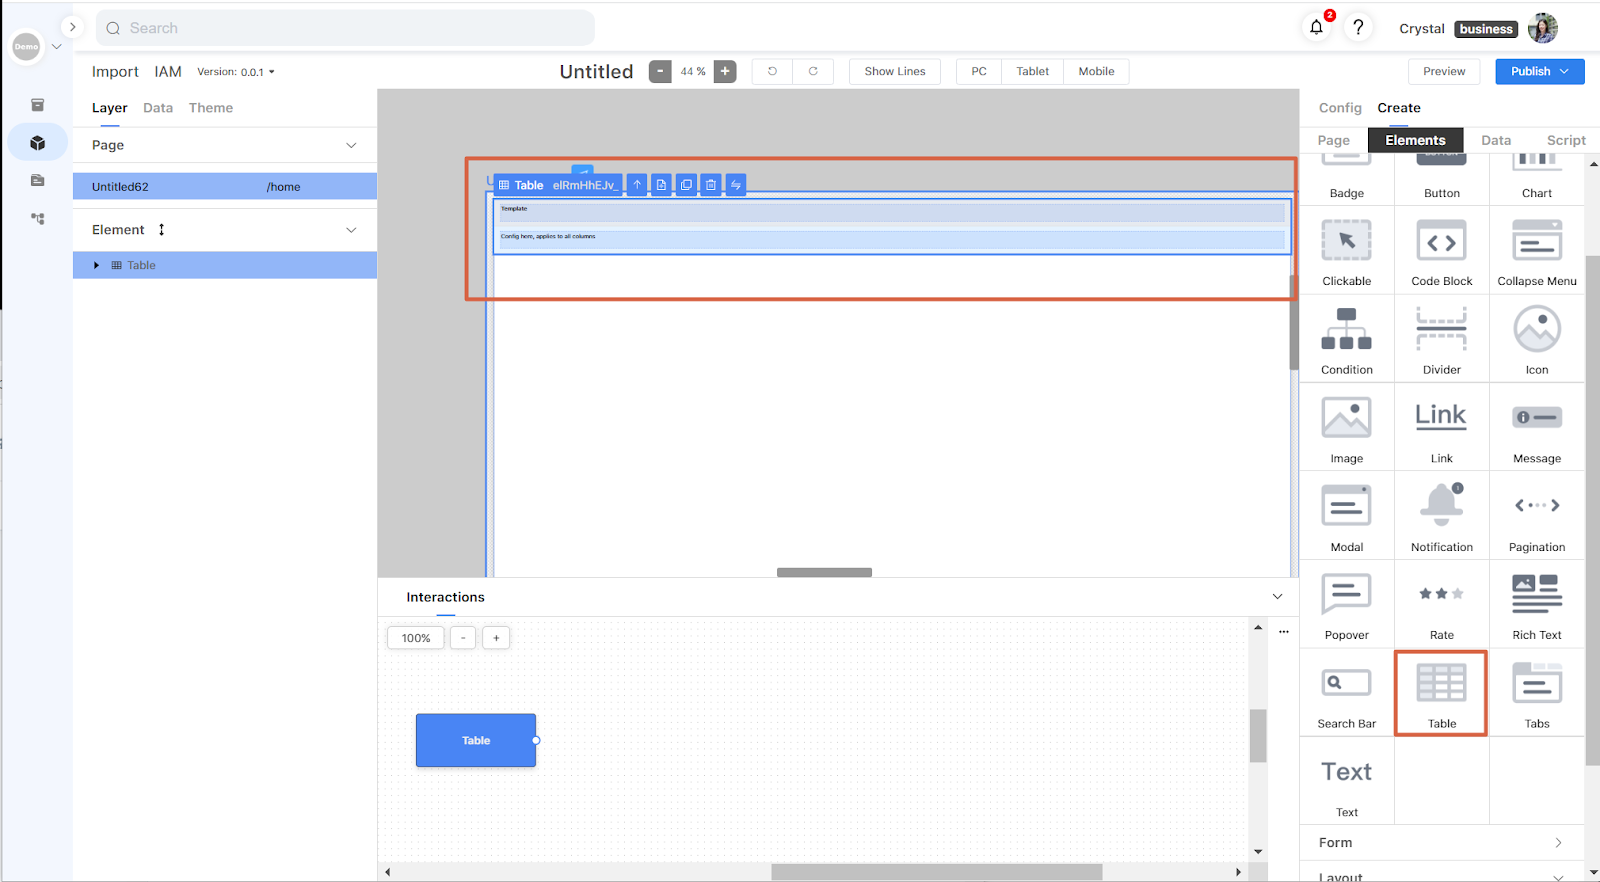
7. Once finishing editing the page, you can exit the editing mode by clicking the

button on the right of the page.
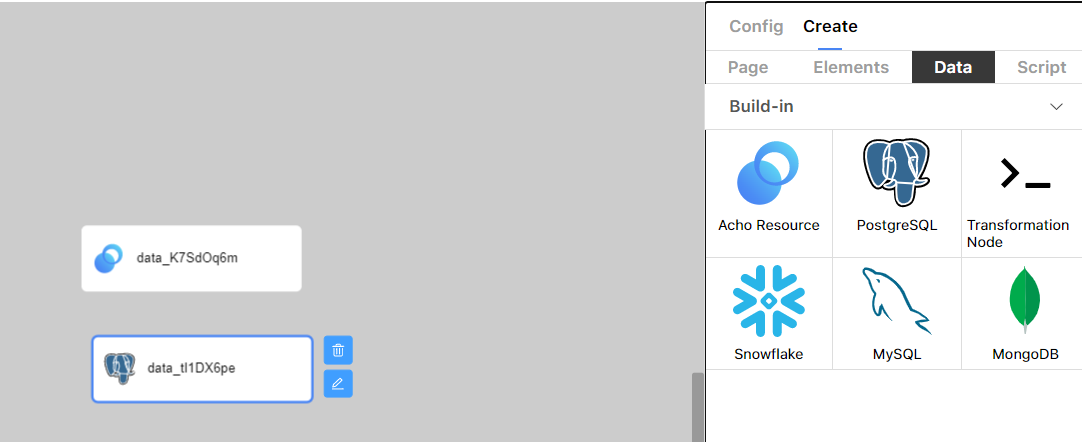
8. Now you can configure your data source by dragging data nodes from the Data panel to the canvas. Data nodes are the main data source of the app. Currently, we support three types of data nodes:
- Acho Resource: Connect to your data source and replicate the data from the data source to the data warehouse hosted by Acho.
- Direct Resource: Connect to and query against your database directly. Currently, the direct connector supports PostgreSQL, Snowflake, MySQL, and MongoDB.
- Transformation Node: Support querying against data from other data nodes.
Different data nodes have different SQL or query dialects. Please see more details here.
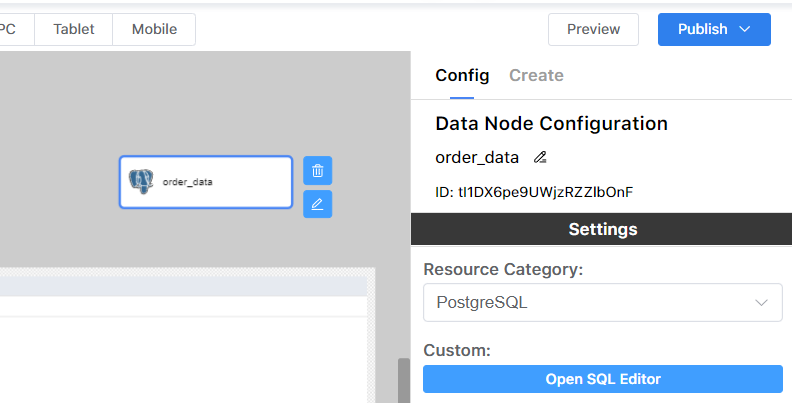
(In the rest of the tutorial, we will use PostgreSQL as an example)
9. Change the name of the data node on the right panel.
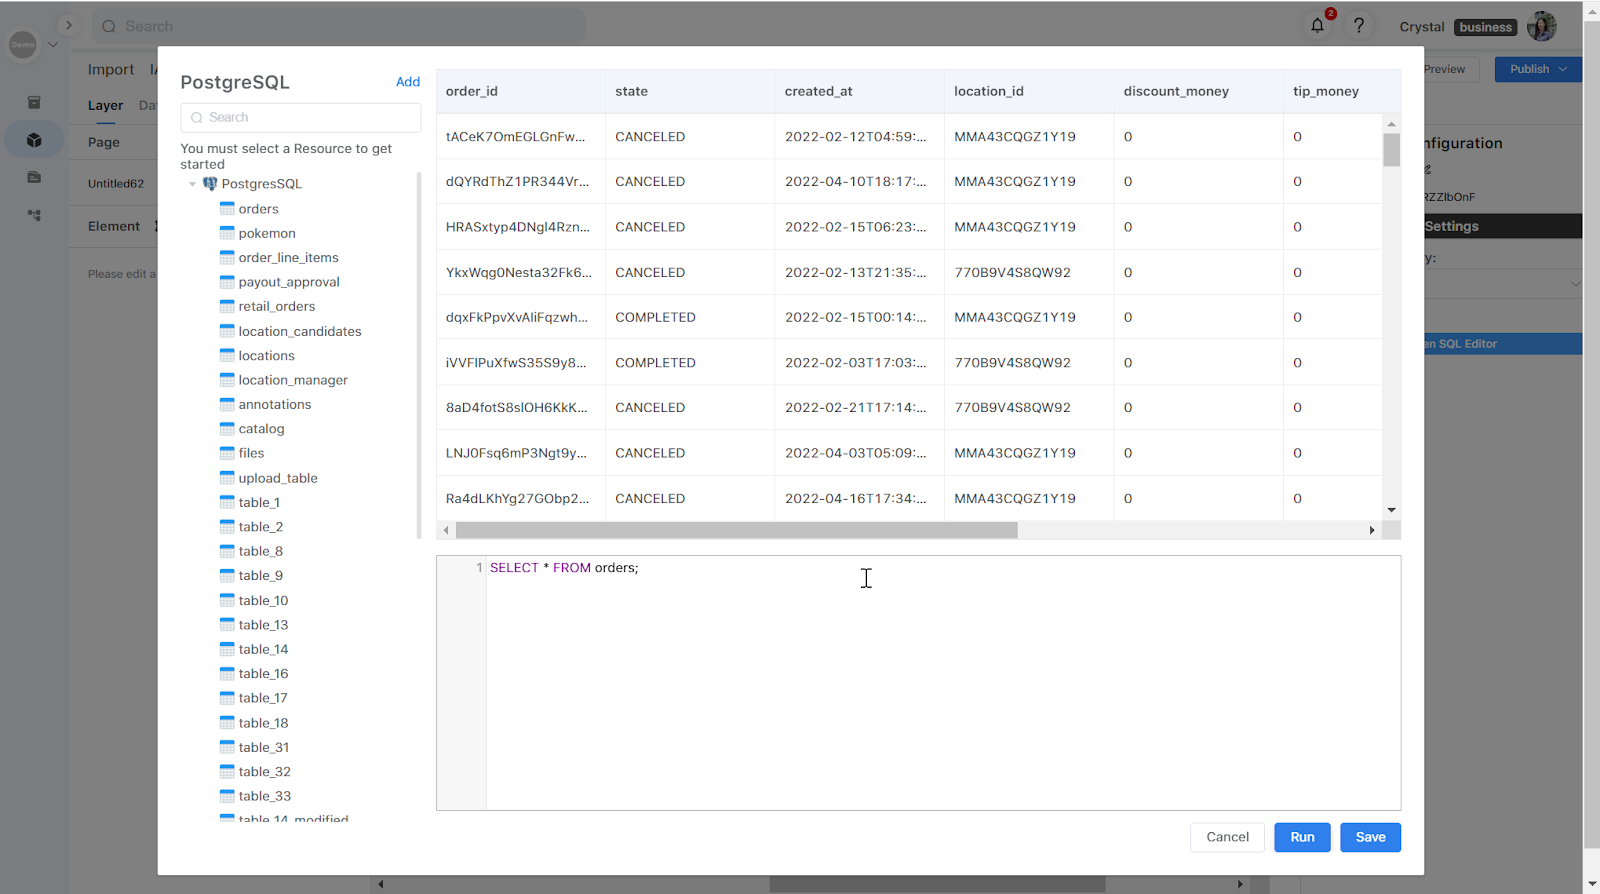
10. Double-click the data node and write a query to retrieve data. Here you write general SQL queries for DDL – Data Definition Language, DQL – Data Query Language, DML – Data Manipulation Language, DCL – Data Control Language, and TCL – Transaction Control Language.
DDL (Data Definition Language):
- Create a table named "employees":
(
employee_id INT PRIMARY KEY,
first_name VARCHAR(255),
last_name VARCHAR(255),
email VARCHAR(255)
);
- Alter a table named "employees" to add a new column named "salary":
ADD COLUMN salary DECIMAL(10, 2);
- Drop a table named "employees":
DQL (Data Query Language):
- Select all data from a table named "employees":
FROM employees;
- Select first_name and last_name from a table named "employees" where employee_id = 1:
last_name
FROM employees
WHERE employee_id = 1;
- Select data from two tables named "employees" and "departments" with a JOIN on the department_id:
e.last_name,
d.NAME
FROM employees e
JOIN departments d
ON e.department_id = d.department_id;
DML (Data Manipulation Language):
- Insert a new row into a table named "employees":
(employee_id,
first_name,
last_name,
email)
VALUES (1,
'John',
'Doe',
'johndoe@example.com');
- Update a row in a table named "employees" where employee_id = 1:
SET first_name = 'Jane'
WHERE employee_id = 1;
- Delete a row from a table named "employees" where employee_id = 1:
WHERE employee_id = 1;
DCL (Data Control Language):
- Grant a user named "johndoe" SELECT privileges on a table named "employees":
- Revoke SELECT privileges on a table named "employees" from a user named "johndoe":
SELECT on employees
FROM johndoe;
TCL (Transaction Control Language):
- Start a new transaction:
- Commit the current transaction:
- Roll back the current transaction:
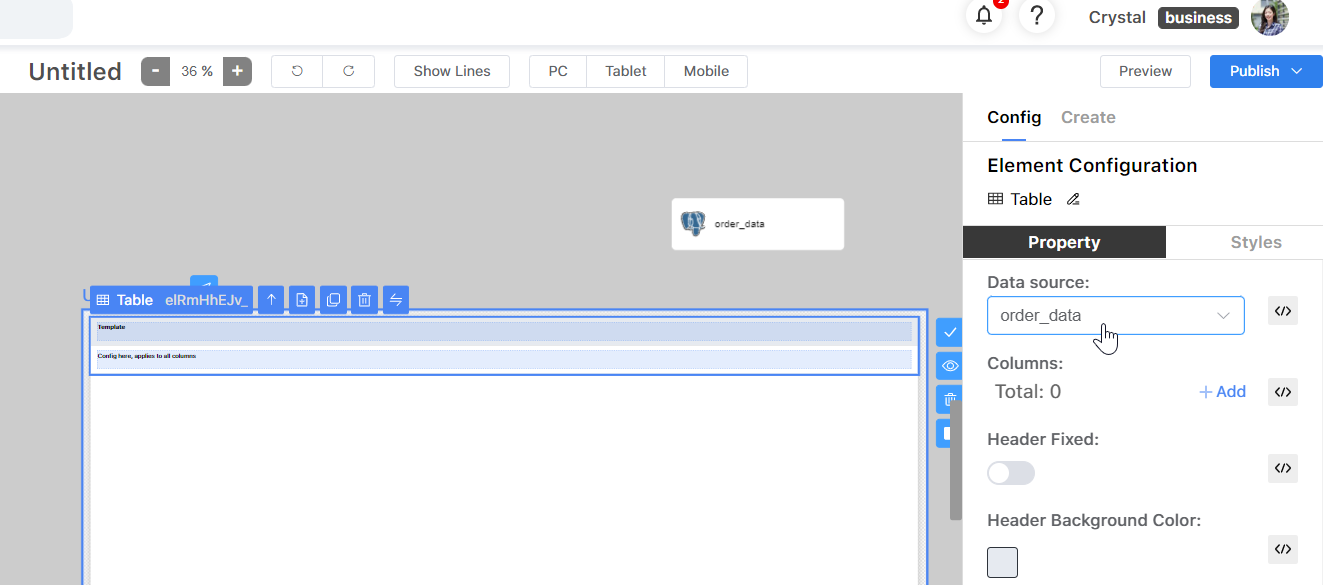
11. Now go back to the page editing mode. Click the table and link the data nodes to the table. (See here to learn more details)
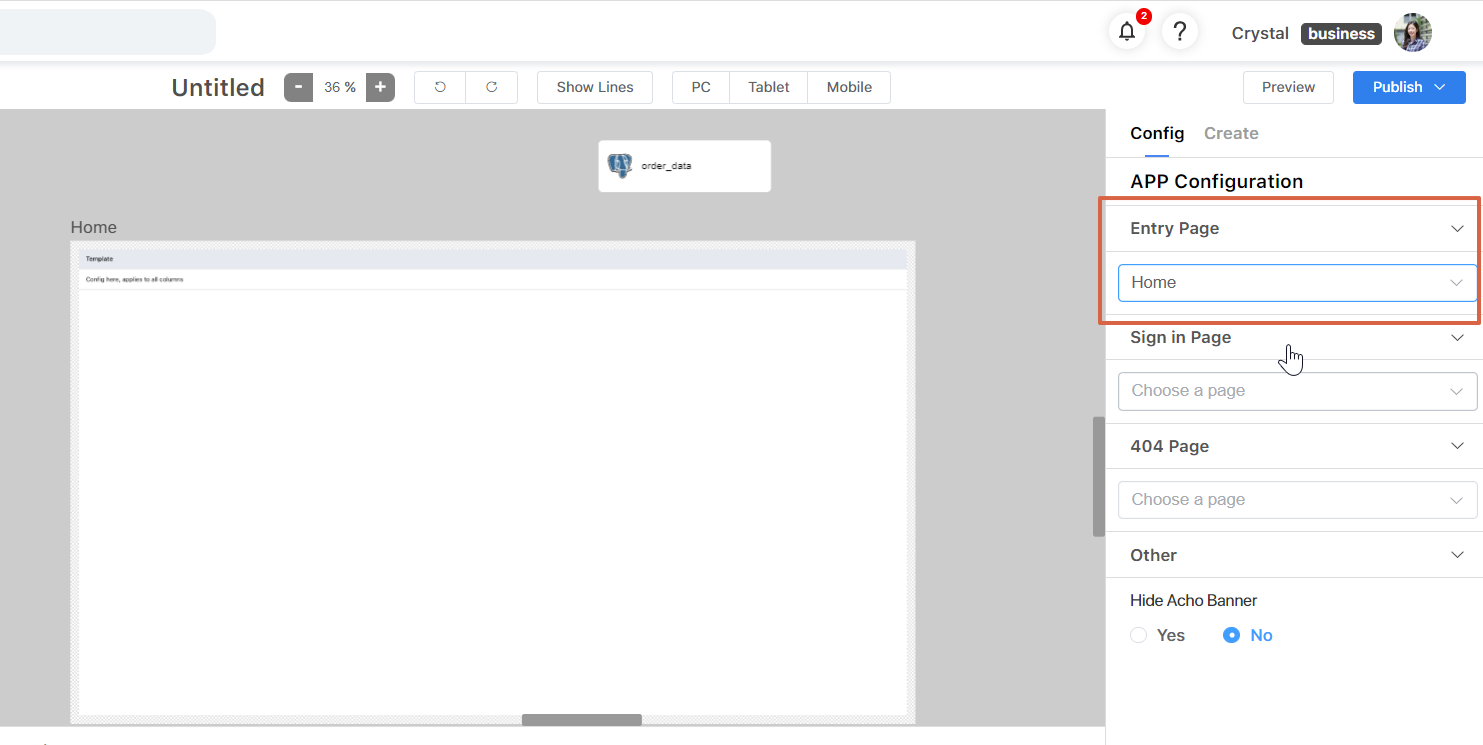
12. Exit the editing mode and click the canvas. Set the home page as the entry page, which means the first page of the app.
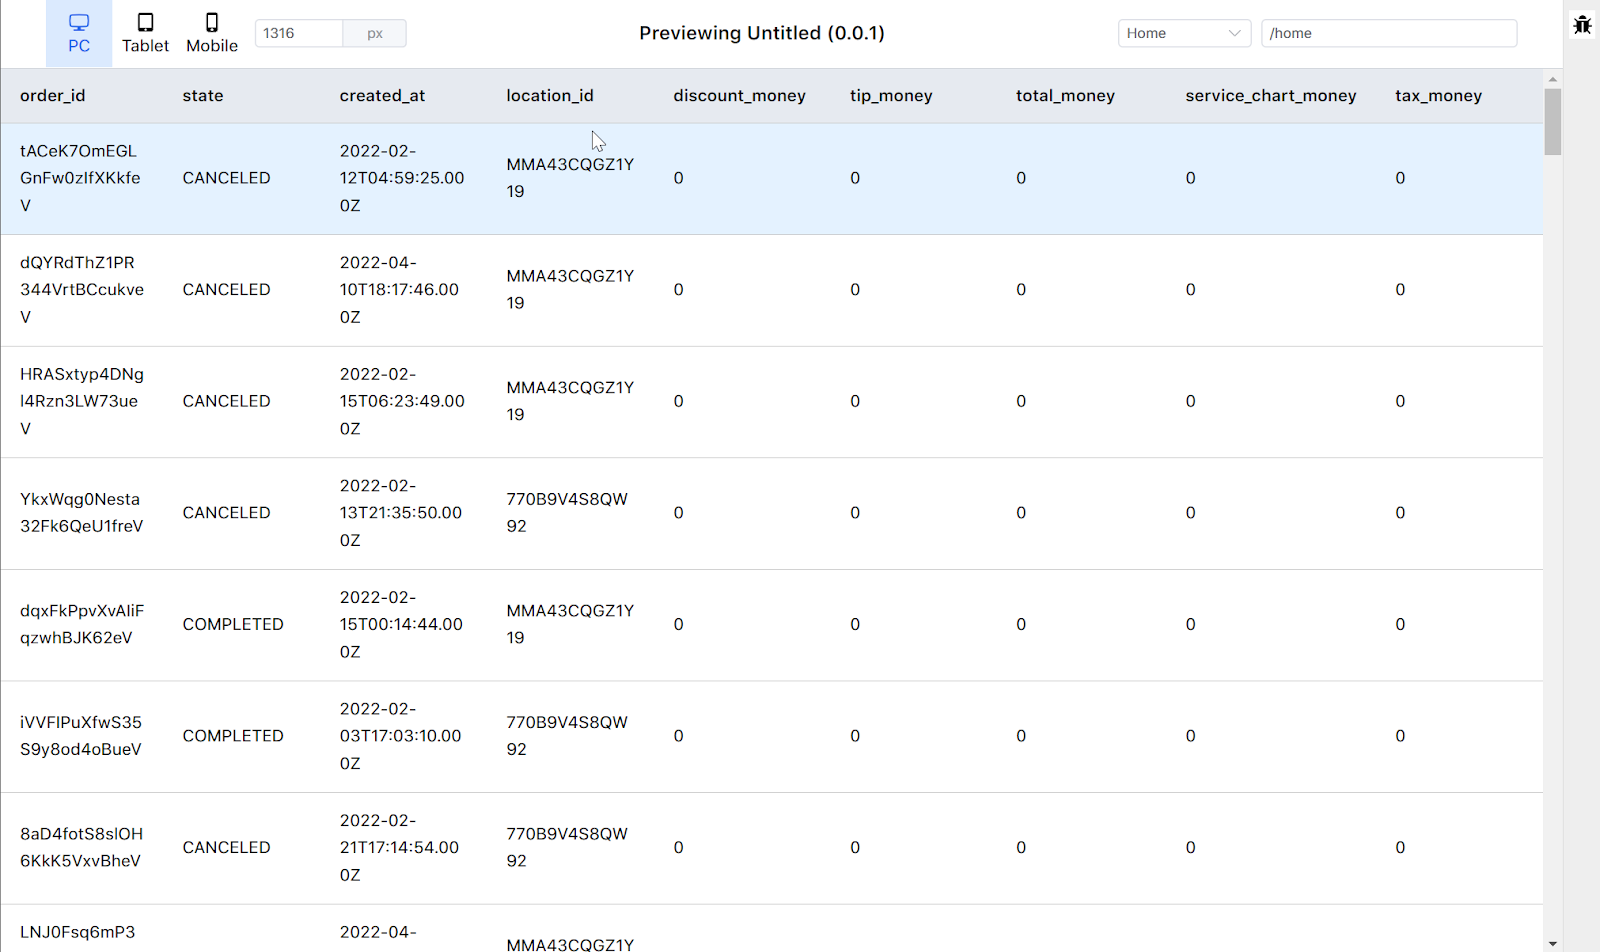
13. Click the Preview button on the top right to see the result.
14. Once your app is constructed, you can click the Publish button to publish your app and share the link with other people.
Contact us in the chat box on the bottom right corner of this page if you have any questions!
- Schedule a Discovery Call
- Chat with Acho: Chat now
- Email us directly: contact@acho.io