Data onboarding essentially means bringing offline data to online. Though there are much more to it. Having data online is now unlocking the value of your offline data more than before. First let's look at the definitions for online and offline data.
Offline Data
If we assume that "offline" means that a device is disconnected from an internet network, "offline" data simply means digital records collected from an offline source. Typically this data is stored in applications like an Excel spreadsheet, desktop program, or local database server. Examples are contact info, third-party data from vendors, receipts, lab results, healthcare records and so on.
Online data
Online data is data collected from the web. They can be data generated from a marketing campaign, being user behavior data, or web traffic data it is different from Offline data. Online data is usually dynamically updated information streams reported from many different sources.
Data onboarding
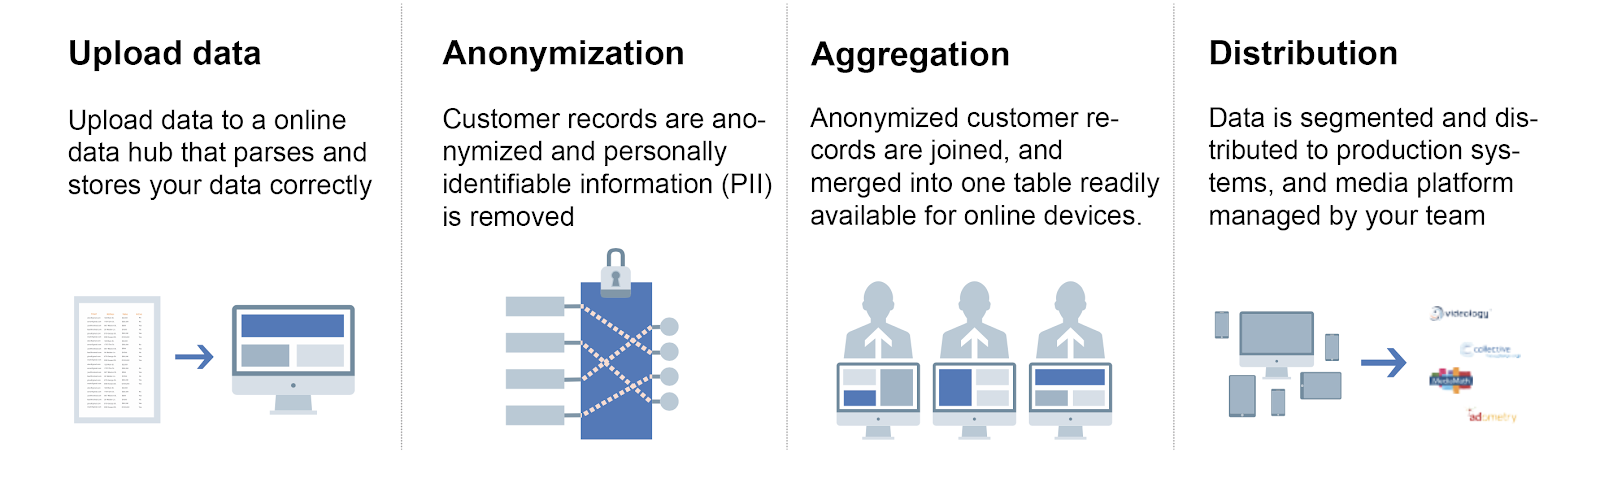
- Upload data from offline sources
Data is huge. We generate so much of it each day. Do you know that around 2.5 quintillion bytes of data are produced by each human everyday this number is still increasing in 2020. Most of the online data generated however are stored in centralized production systems such as databases, data warehouses, and dedicated servers. They are closely maintained, monitored and sheltered from external requests. This is when a CSV file comes into rescue! A CSV file can store all the disseminated data from the servers in a flat file, which you can easily manage and transfer between two people.
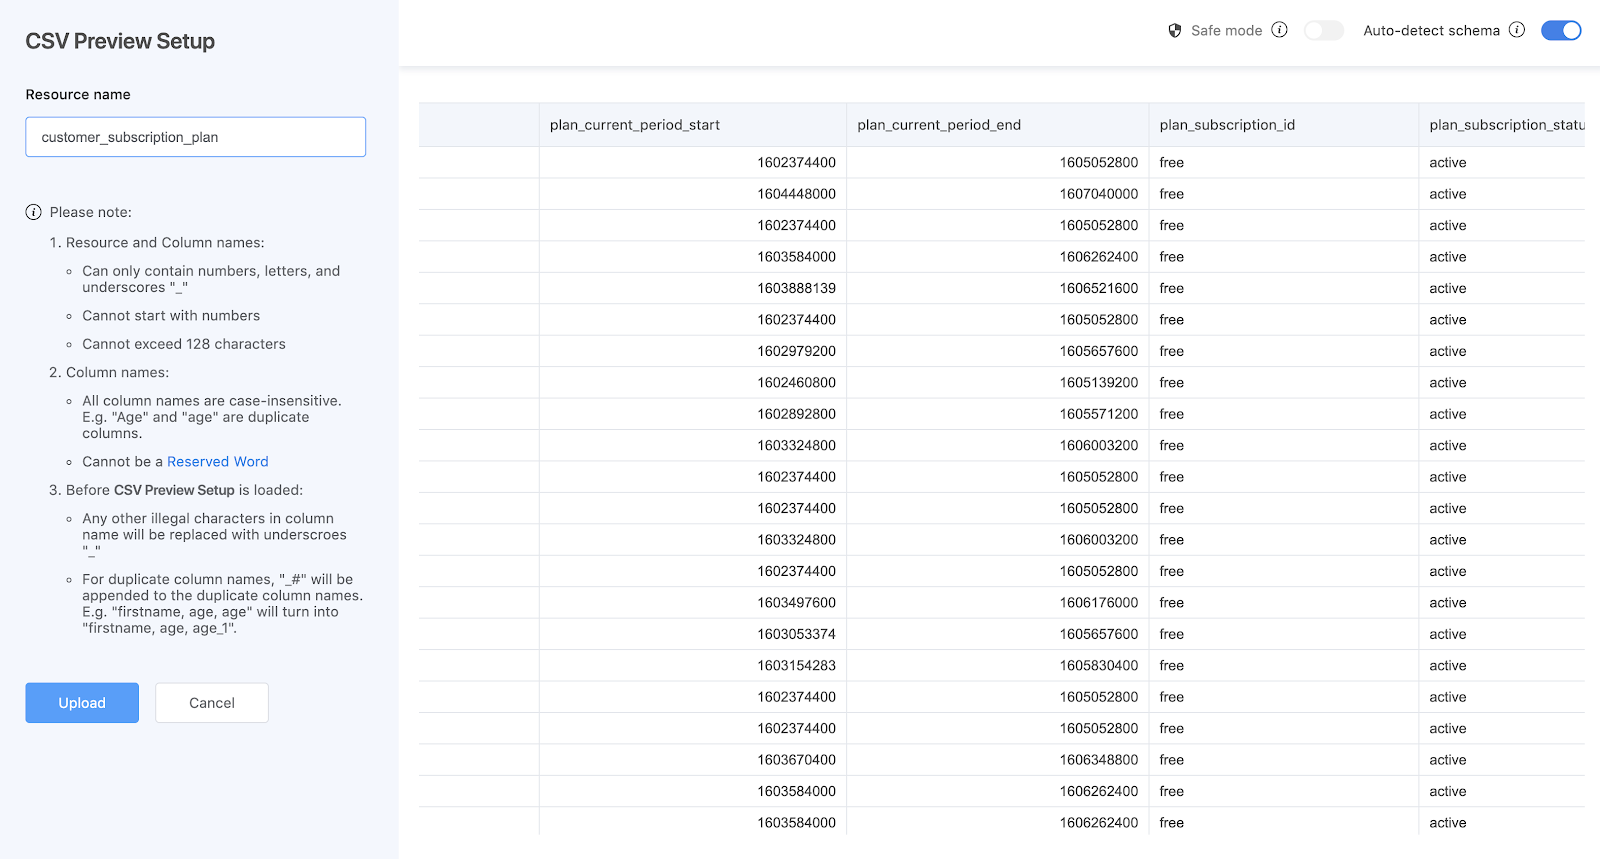
Uploading CSV files to an online system however can be a little tricky. One of the main drawbacks about offline data is that it can be messy, unstructured, and inaccessible due to missing records, mismatched schema, irregular entries, and sometimes its sheer size. By bringing data to the cloud, you can make sure the data can be accessed and processed in one system at a much faster rate.
On Acho Studio however, we’ve made it very easy for you to parse your CSV file for a database management system. This way, it doesn’t matter what your CSV may look like, you can bring it to the cloud regardless.
2. Anonymize your data
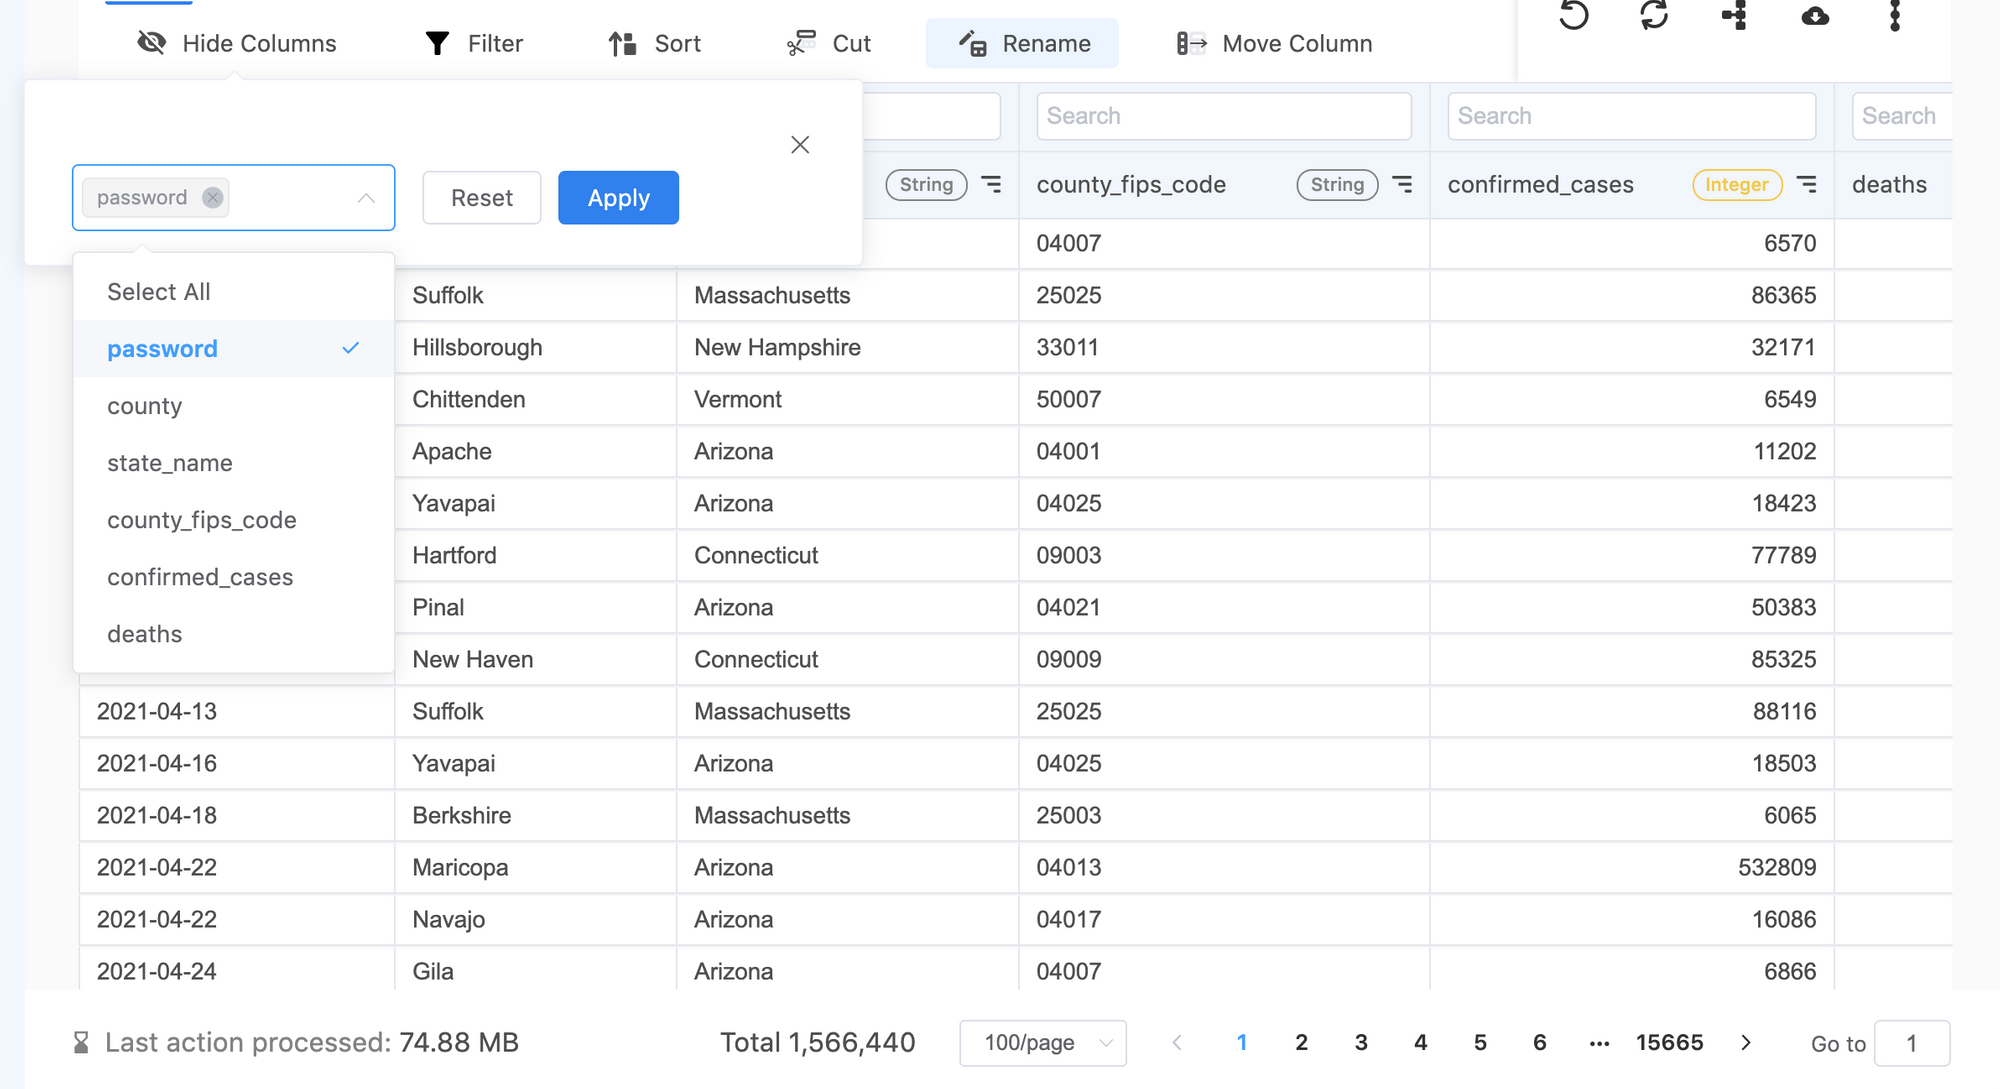
Data records may contain sensitive information such personal contact or private details. Post-processing your data assets may be required per your company’s policies. Data entries such as personally identifiable information for example should be hidden or masked in your data hub. For example, you can hide the user password column before further action.
3. Aggregating your data
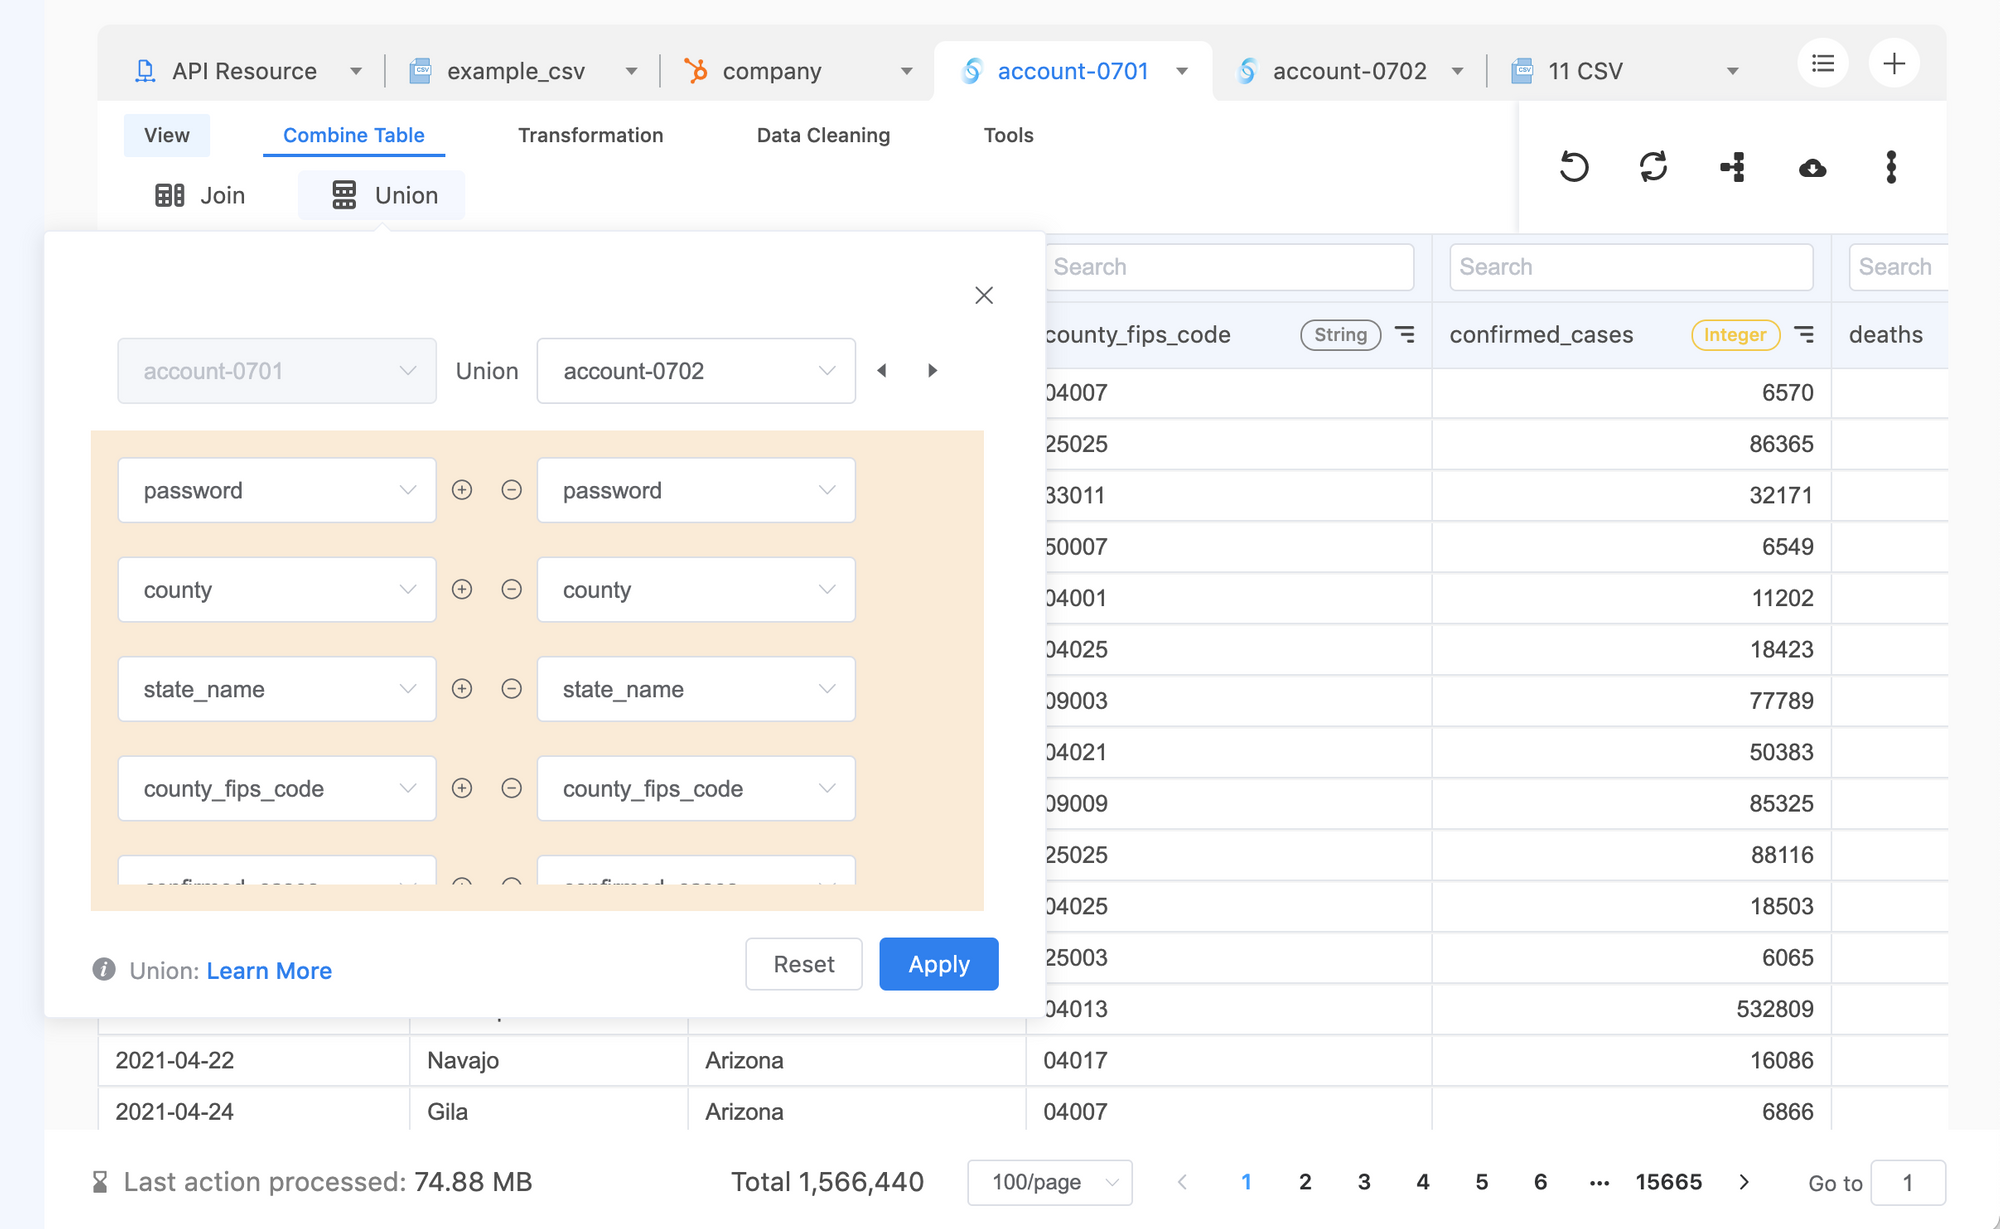
Once data has been anonymized and cleansed, you can start combining different tables into one good table for production needs. In this step, your main goal is to connect tables logically based on a key column that may contain IDs, emails or names. By doing so, your table should contain all necessary information for distribution.
On Acho, you can use either the Join action or Merge action to combine tables vertically or horizontally. By selecting the column as an identifier key, you can effectively link tables together.
4. Distribute your data
Once your data is on the cloud, you can share it with someone, build an application, or use it to power another tool such as an Email Relay service or Business Intelligence software. This step is done usually via a connector or API.
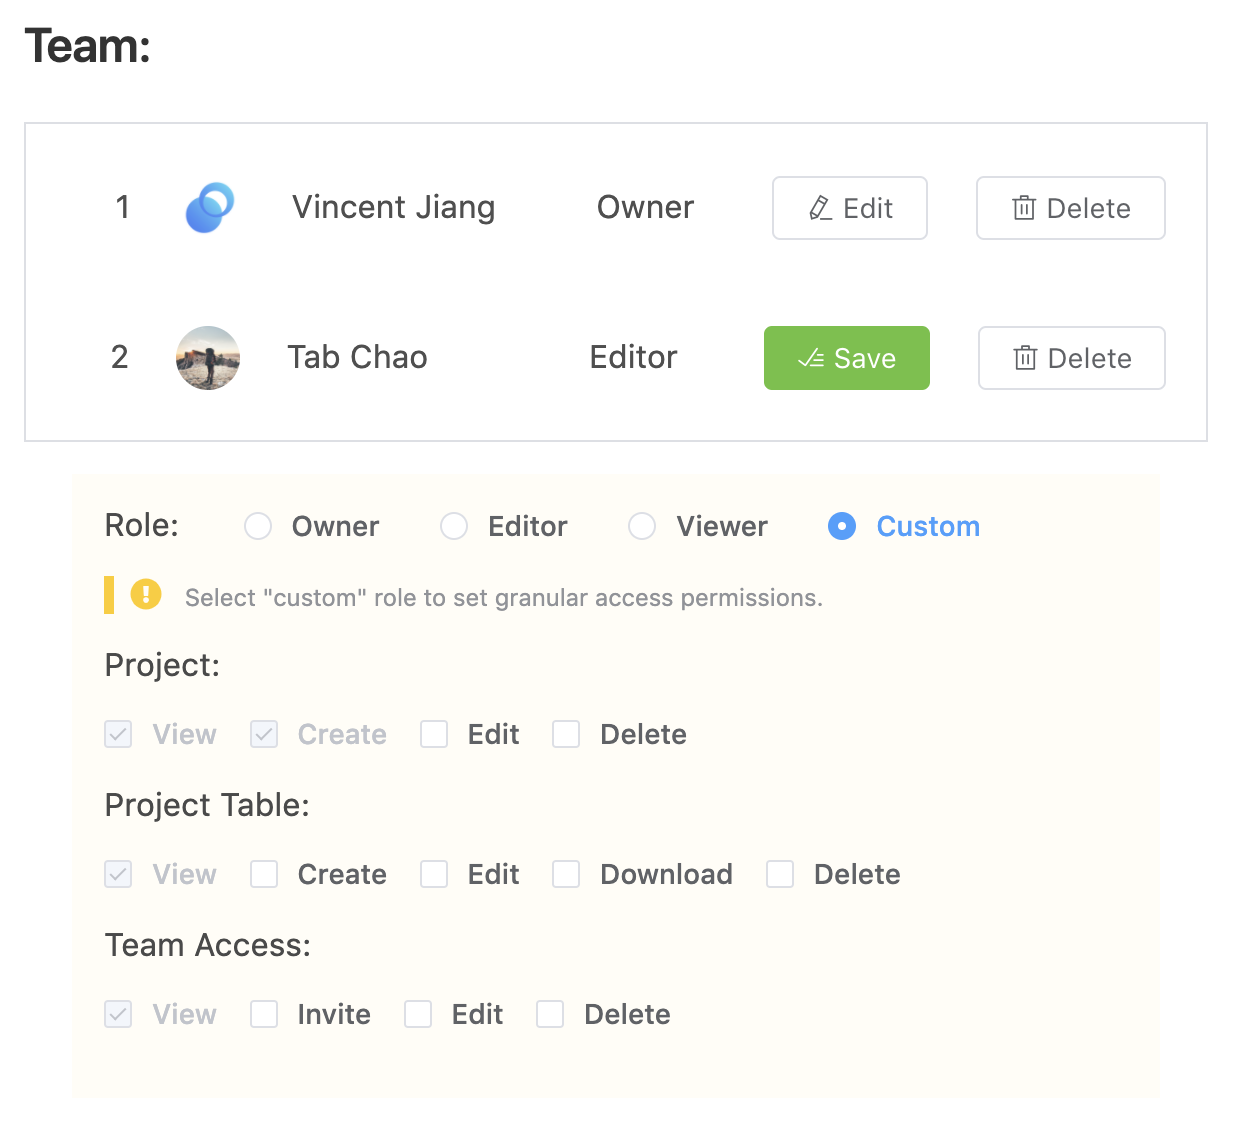
On Acho, you can easily share your database with your teammates and assign permission to each of them. This makes your data assets more visible and liquid for decision making.
If you have any question regarding onboarding your offline data, feel free to reach us at contact@acho.io